Python, VS Code, And Git Setup Instructions
These are setup instruction to get you up and running for the Python section of this course. If you have any issues during or after the setup, check out the FAQs, and if needed, come to office hours or ask in the #python-installation Discord channel
1 Installing Python 3.11 Or Newer
We will use Python version 3.11 or higher in this course. Please follow the below instructions to install a Python interpreter that works with VScode
1.1 Confirm current version (if any)
Before installing anything, check if you already have a compatible version of Python
macOS
Open the Terminal application (it is pre-installed on all Macs), and run the following command:
python3 --version
If this results in an error, or reports a version of Python below 3.11, follow the steps below. Otherwise, skip to VSCode Setup
On Mac, if this opens a window to install Command Line Developer Tools, you can install this, as it will also install Git, which we need. You should STILL follow the steps below to install Python after this is installed
Windows
Open the Command Prompt or PowerShell (it is pre-installed on all Window computers), and run the following command:
py -3 --version
If this results in an error, or reports a version of Python below 3.11, follow the steps below. Otherwise, skip to VSCode Setup
1.2 Install Python
Windows
- Go to python.org/downloads
- Click “Download Python install manager” (the big yellow button)
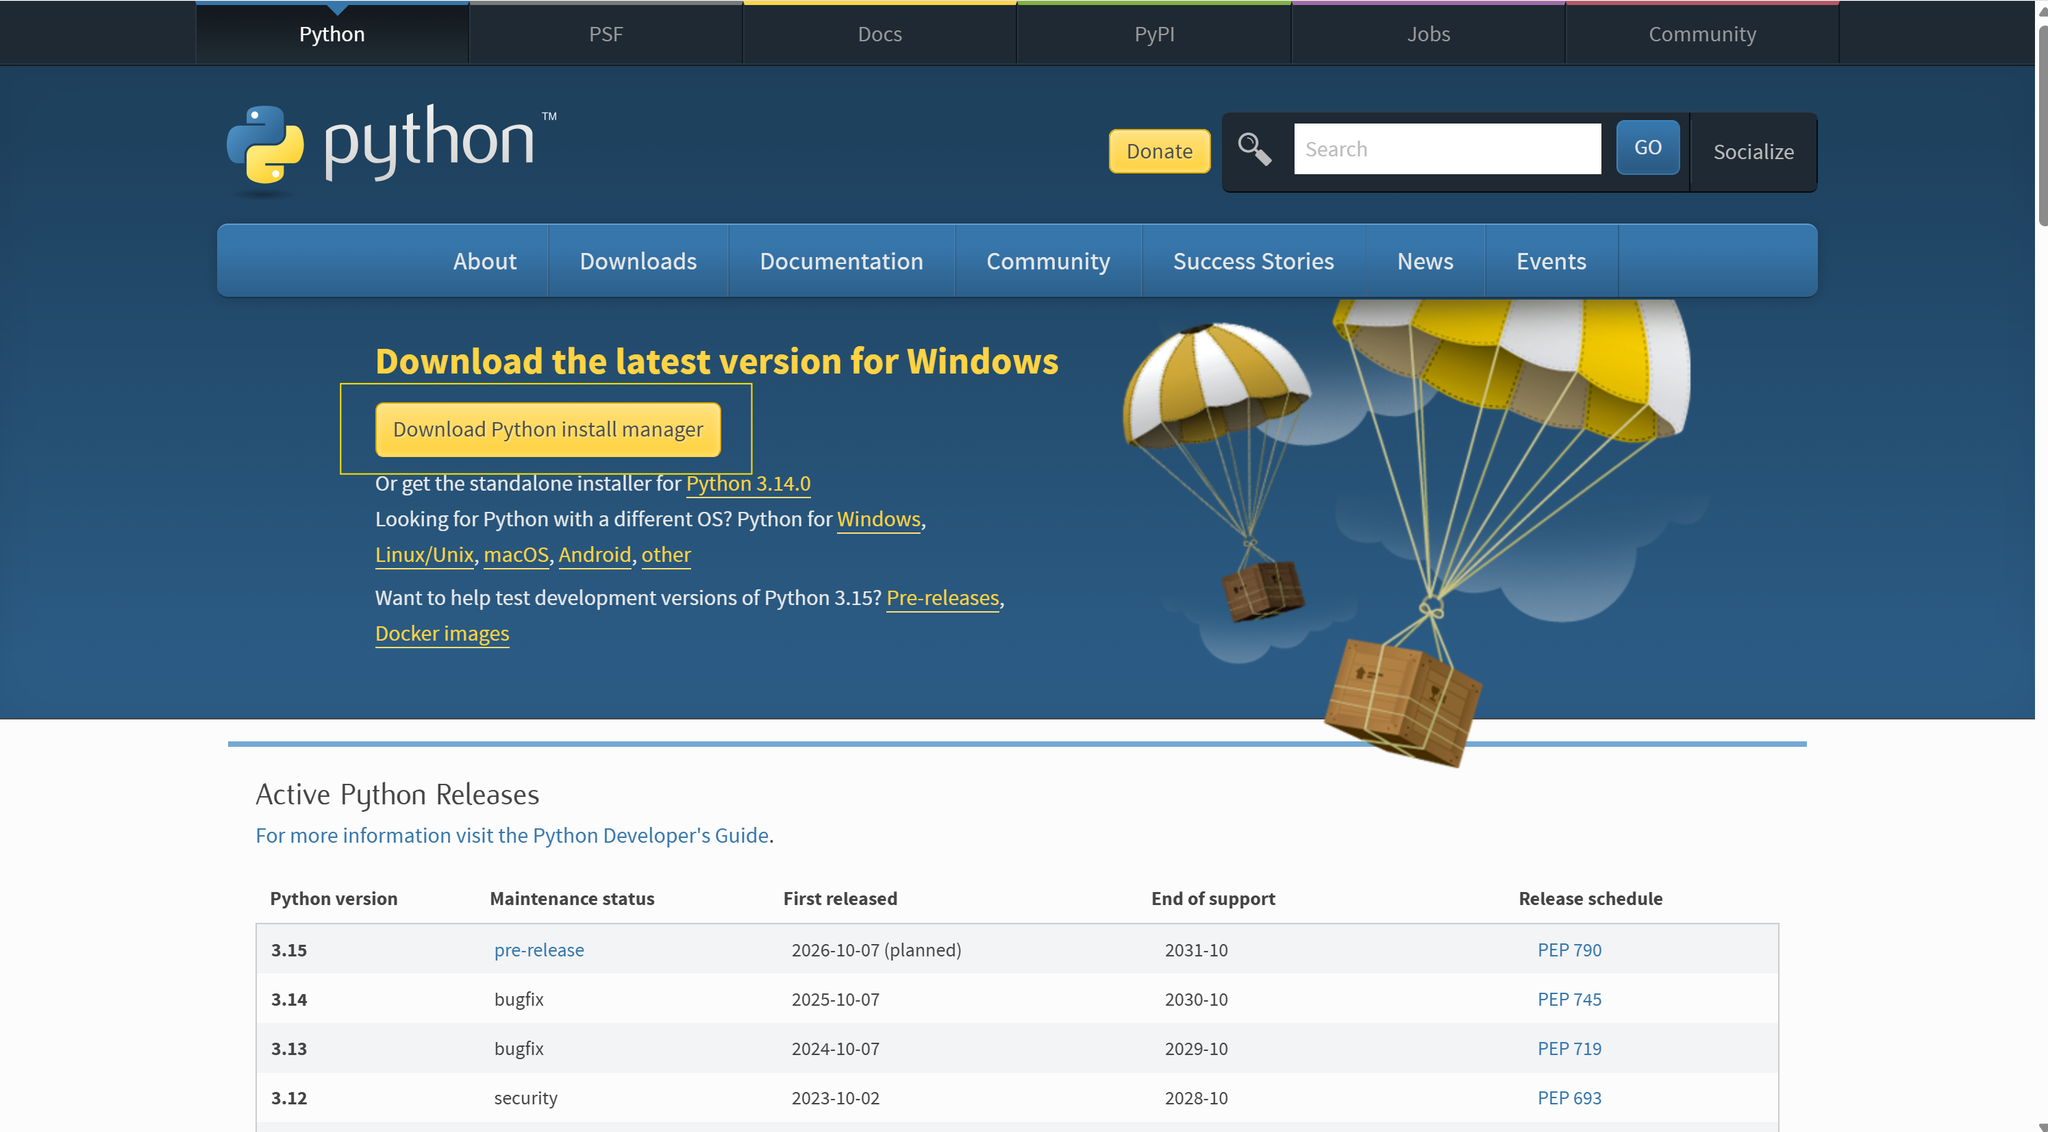
- Run the installer and click Install Now
- After installation, open a new Terminal (be sure it's a new Terminal) and verify by typing the following and hitting return:
py -3 --version
You should see something like Python 3.11.9. Any version 3.11 or higher is fine.
macOS
⚠️ Older versions of macOS came with an older “system Python” used by the OS, and may still be installed. Do not use that version. Instead, install your own Python 3.11+
- Visit python.org/downloads
- Download the macOS 64-bit universal installer for Python 3.11+.
- If the installer doesn't open automatically, go to the Downloads folder and open the
.pkgfile - Follow the prompts
- After installation, open a Terminal and verify by typing the following and hitting return:
python3 --version
This should print something like Python 3.11.9. Any version 3.11 or higher is fine
2 VSCode Setup
2.1 Install VSCode
Windows & macOS
- Go to https://code.visualstudio.com/ and download VSCode
- Your next step will depend on your operating sytem
- On Windows, run the installer and accept defaults
- On macOS, you may need to double-click on the downloaded file to uncompress it (if the filename ends with "zip"). Drag into the Applications folder or, if you don't see it, follow these steps:
- Open a new Finder window with
⌘N - In the new window, go to the Applications folder through the dropdown menu (
Go > Applications) or with⇧⌘A(shift-command A) - Drag
Visual Studio Codefrom the Downloads folder to the Applications folder
- Open a new Finder window with
- Drag Visual Studio Code from the Applications folder to the dock for easy access
- Launch VSCode
2.2 VSCode Extensions: Python, Python Environments, Pylint, Mypy Type Checker
You will install each of the following from the Extensions view (left sidebar icon with 4 squares):

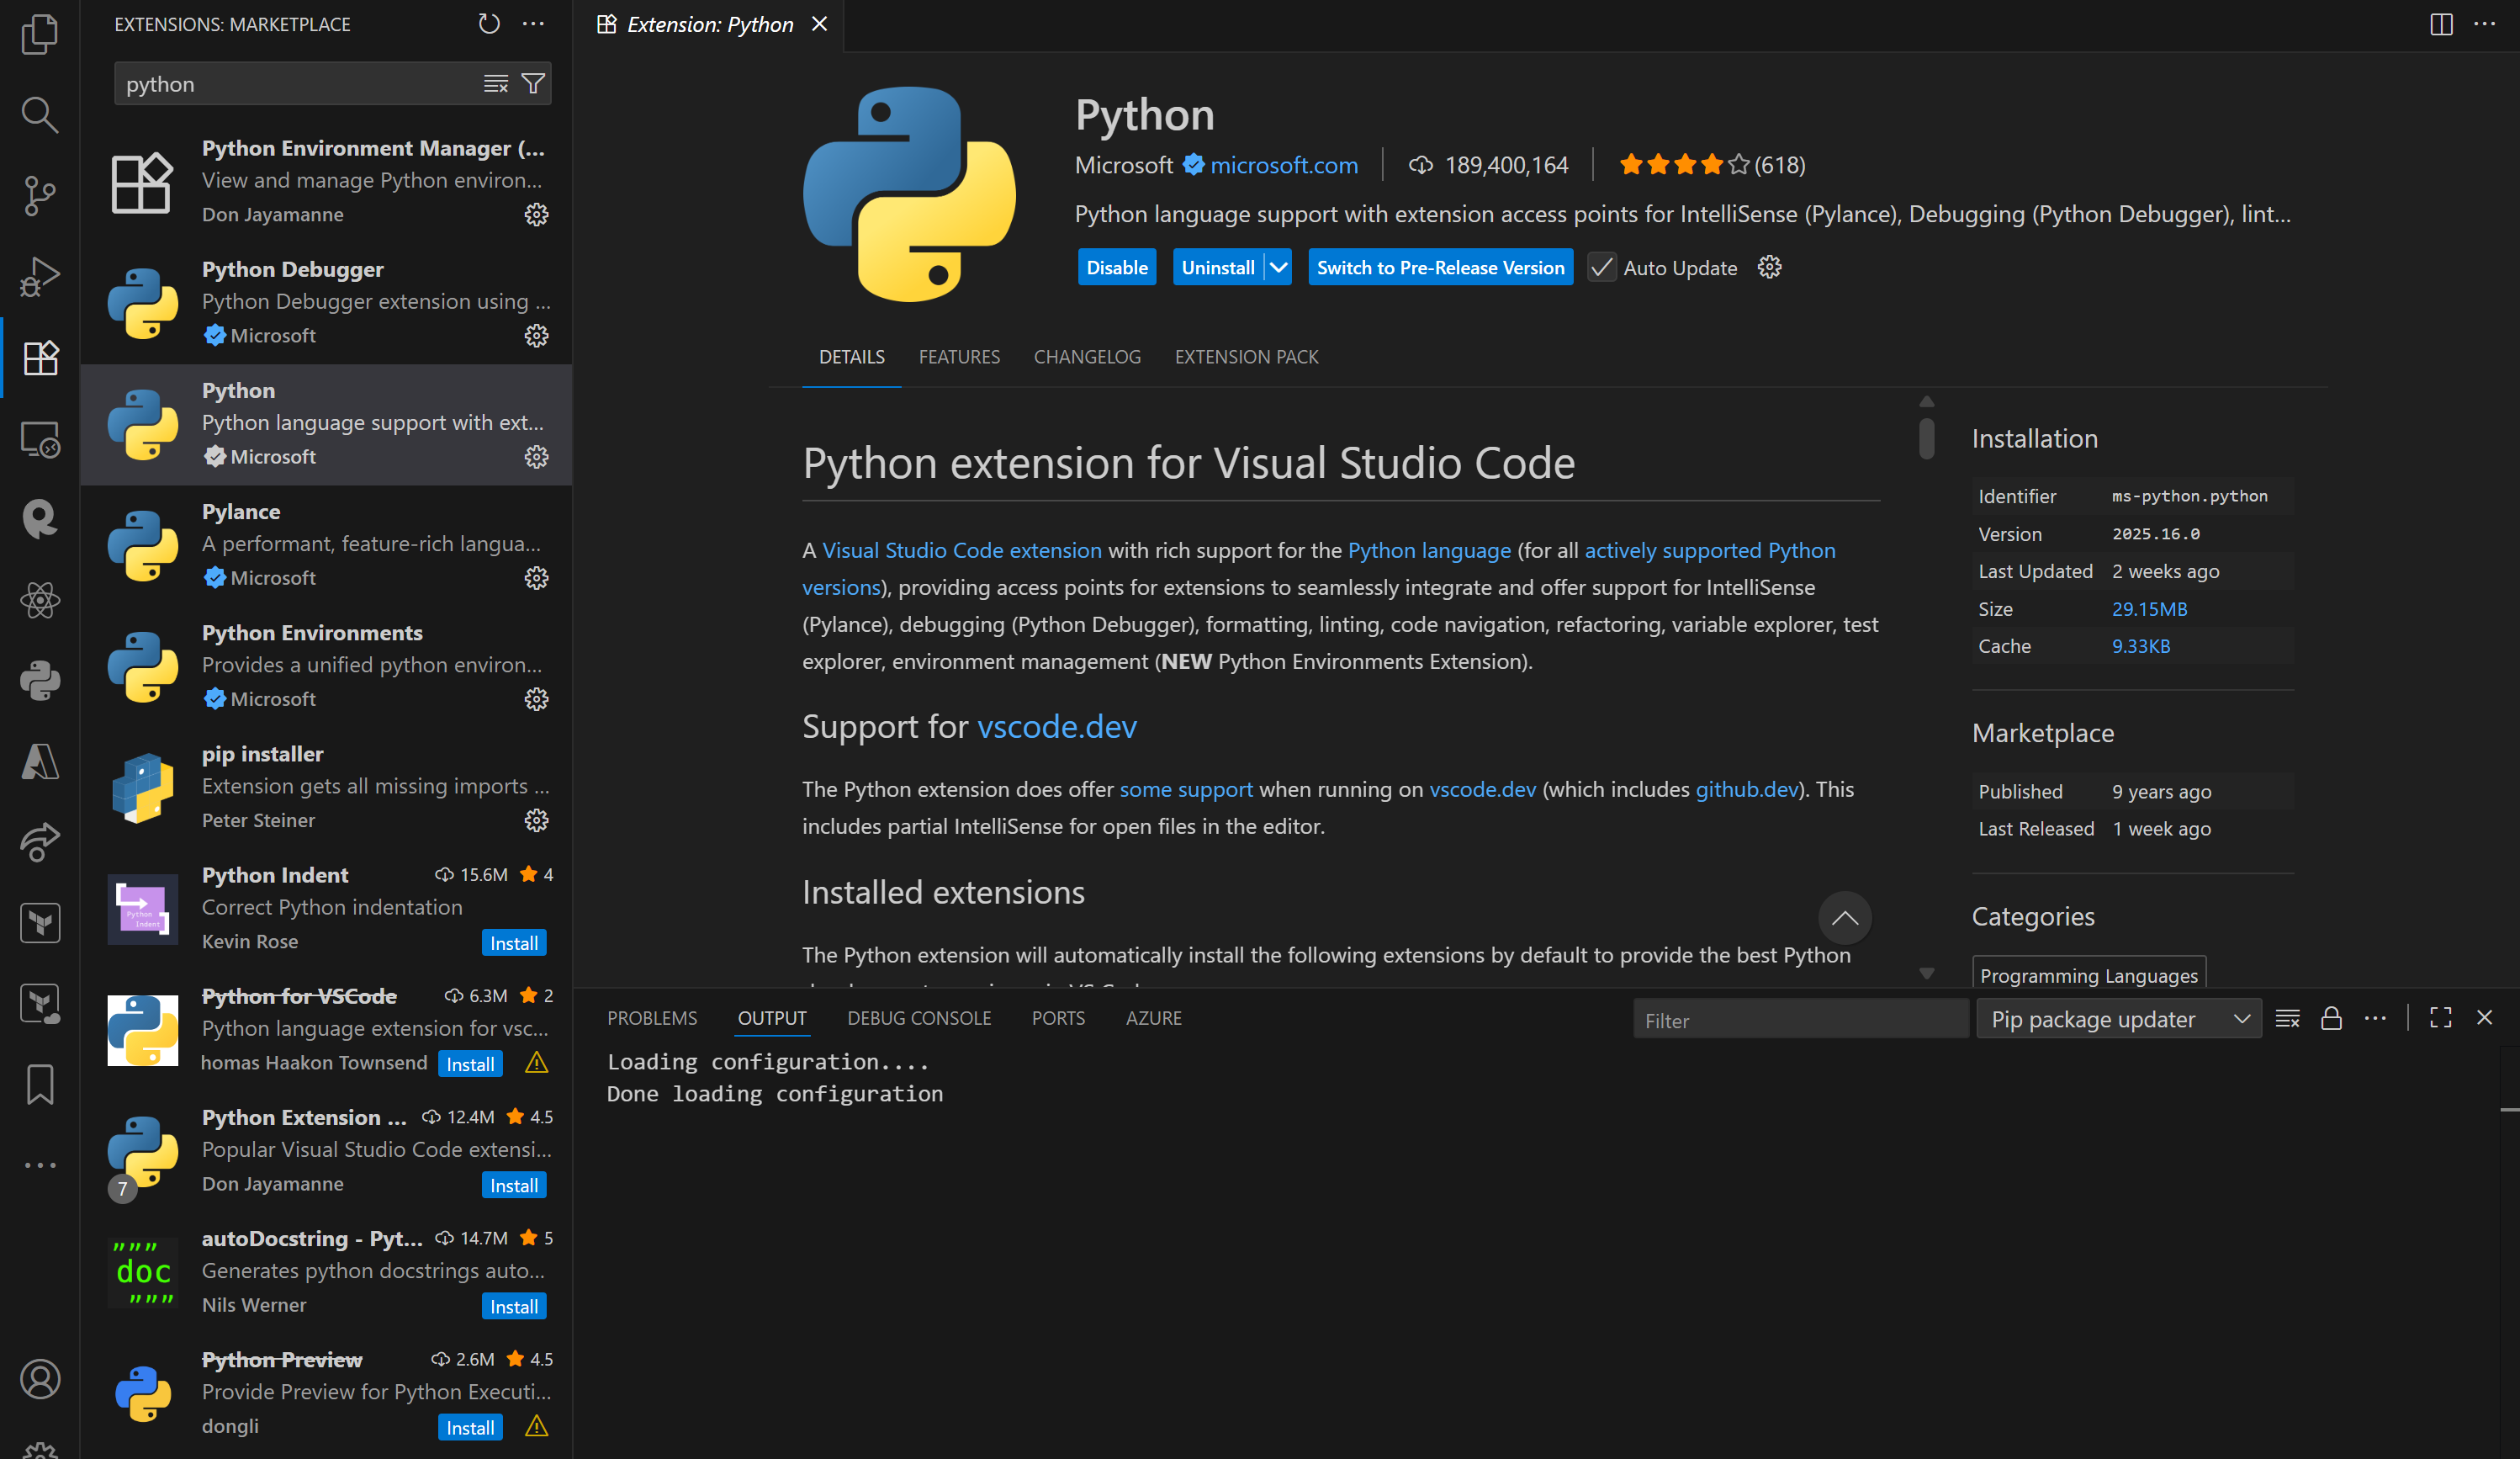
Install Python Extension
- There is an extension in VSCode that enables Python features
- Search for “Python” by Microsoft
- Make sure that the extension's entire name is "Python" (not "Python Debugger")
- Click Install
Install Python Environments Extension
- Search for "Python Environments" by Microsoft
- Click Install
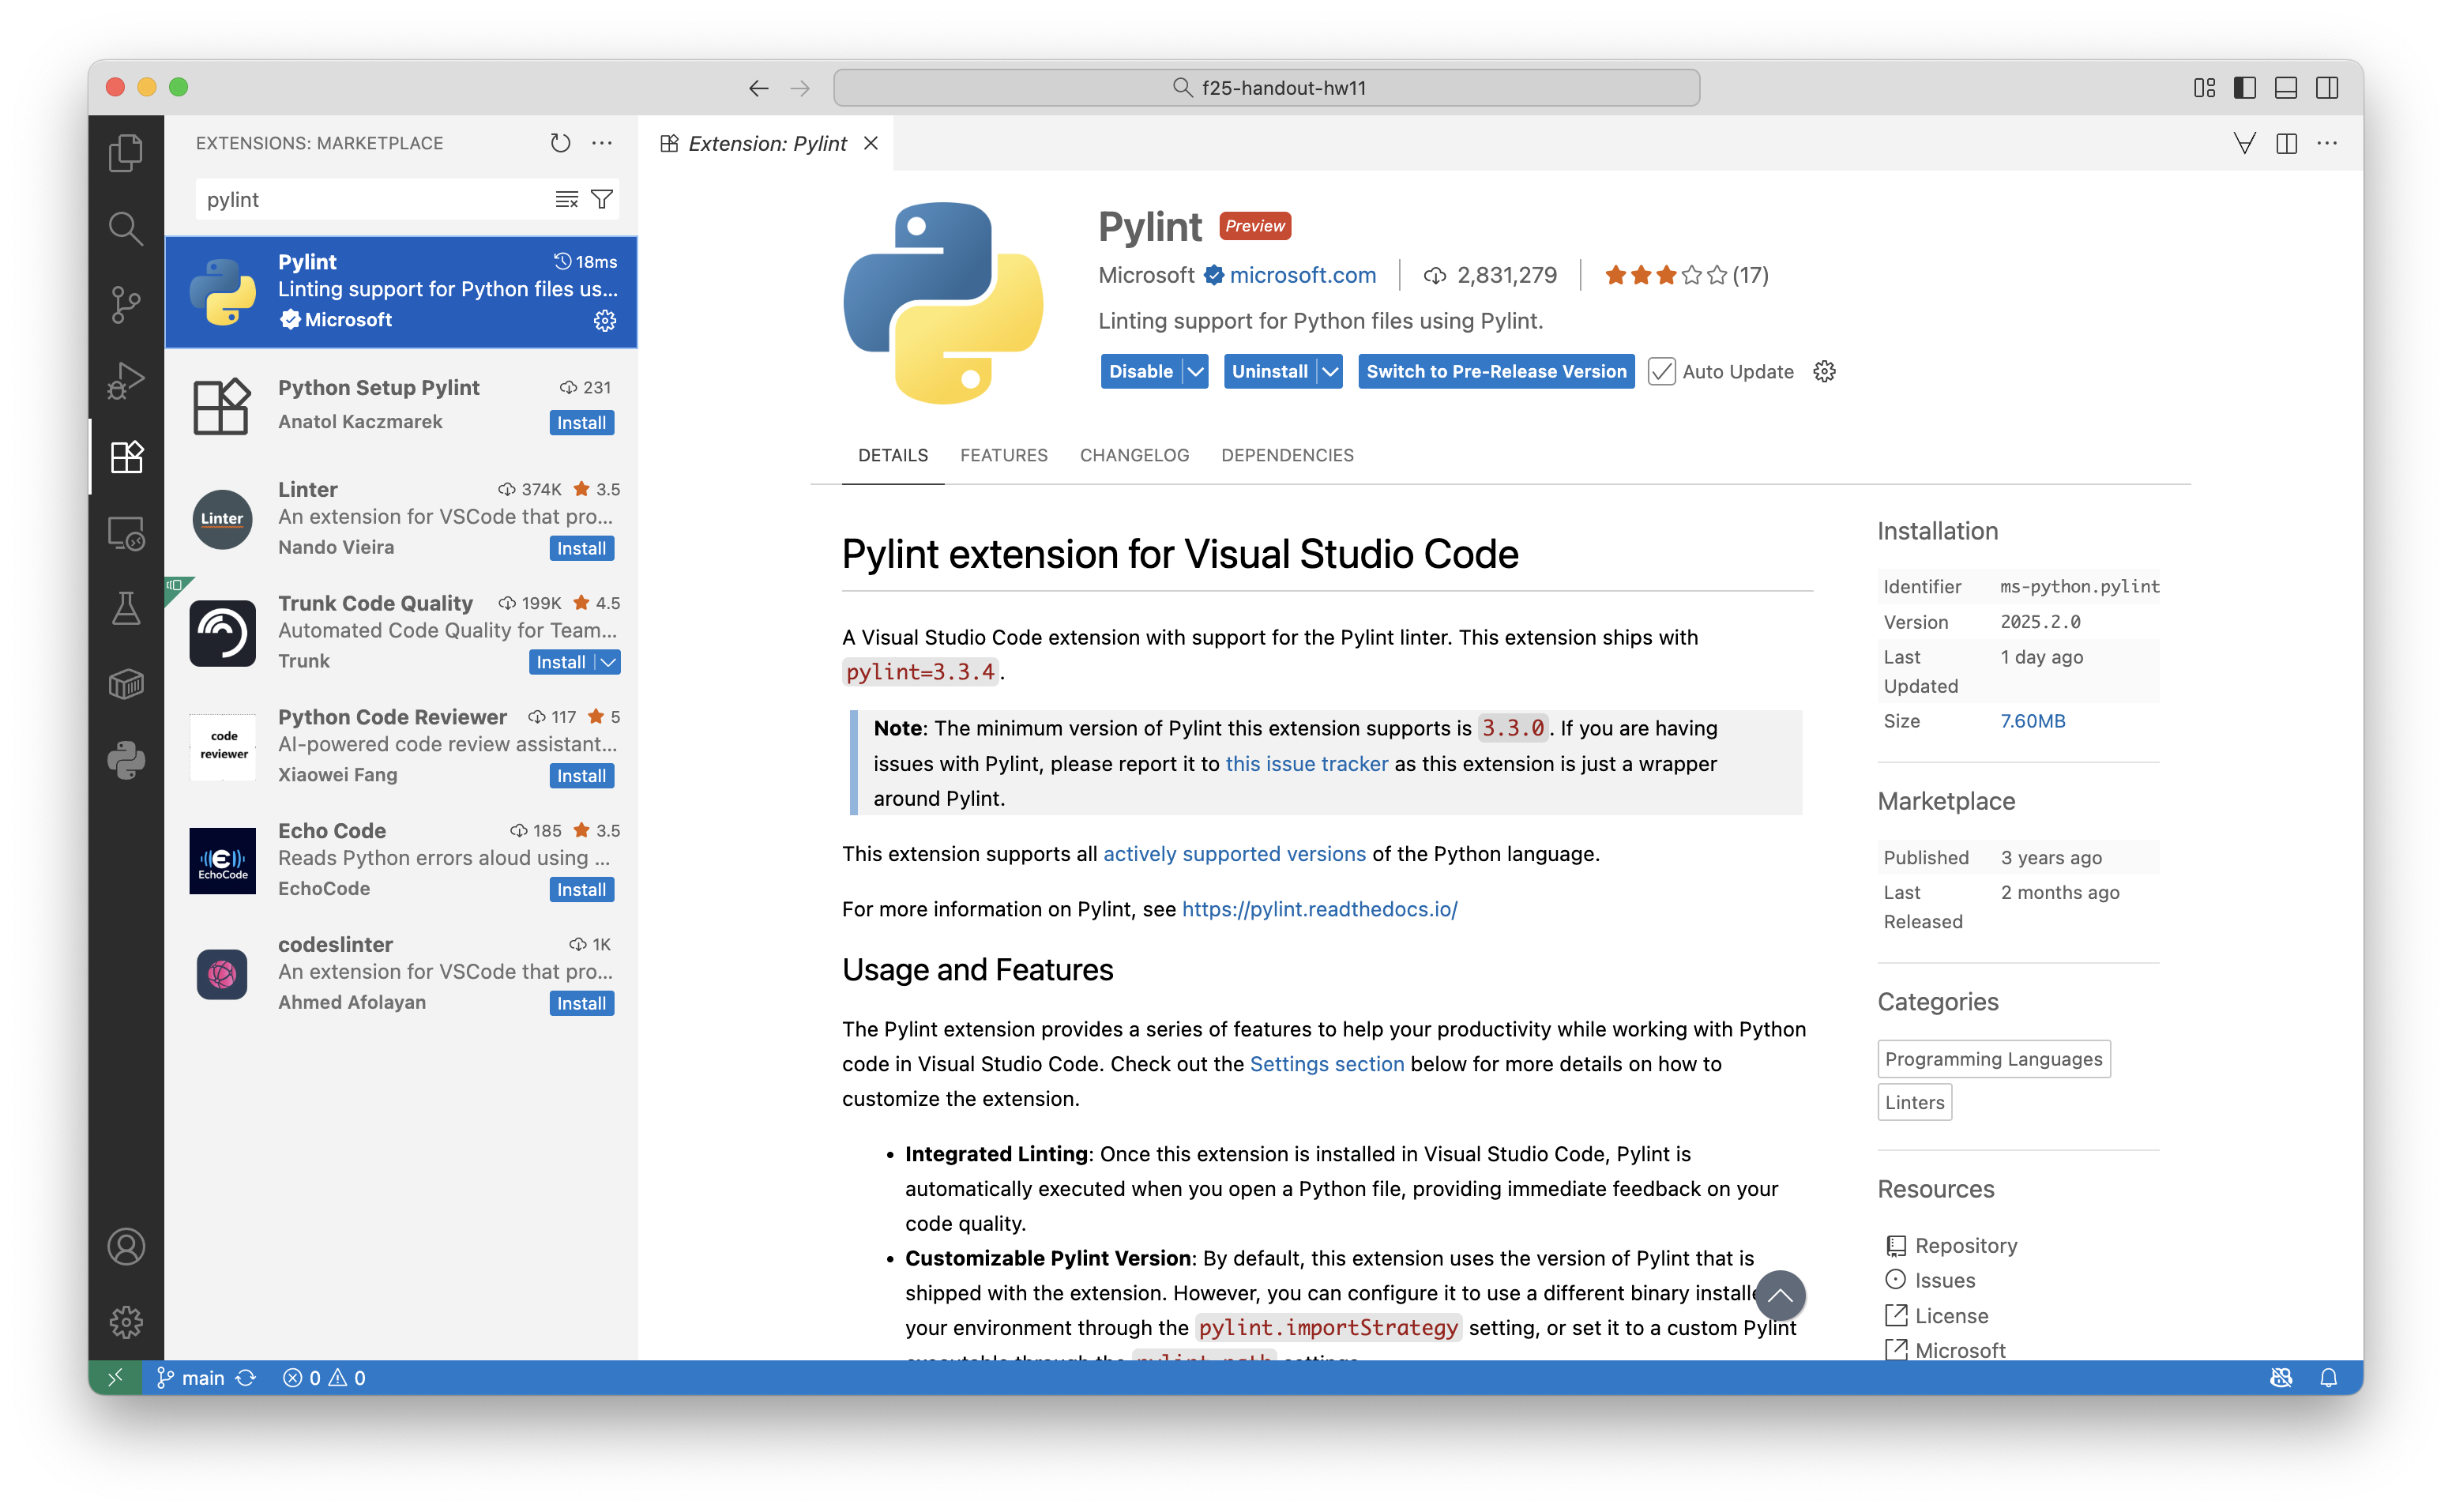
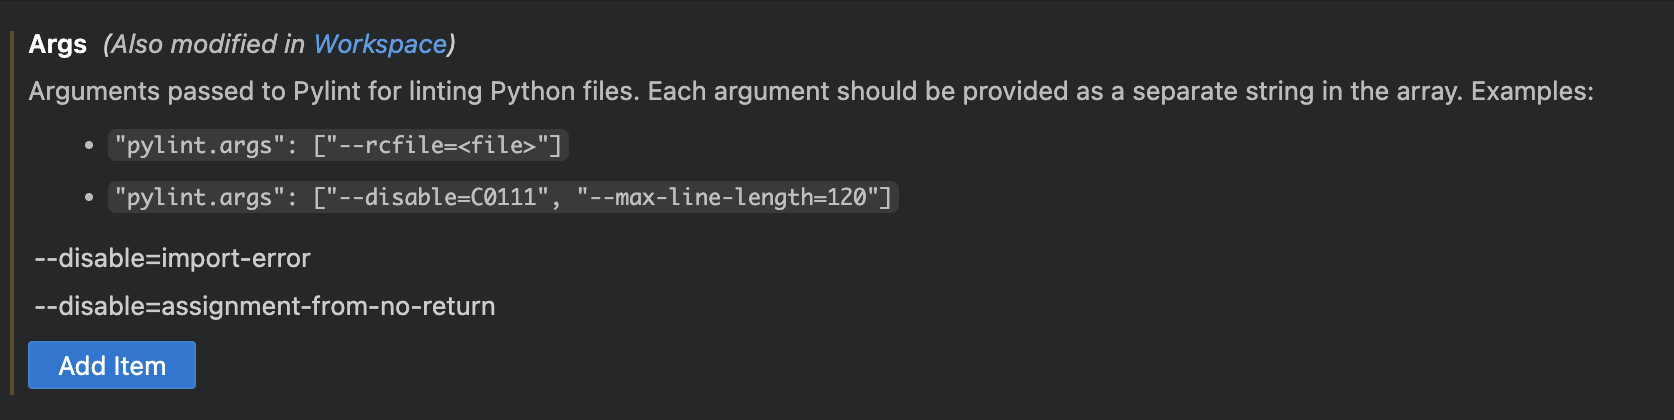
Install Pylint Extension
We will use Pylint (documentation here) to check that our code follows the style guidelines. The autograder for each assignment will also be running Pylint
- In the Extensions tab, search “Pylint” and click Install
- When it's done, click on the gear icon and then click Settings
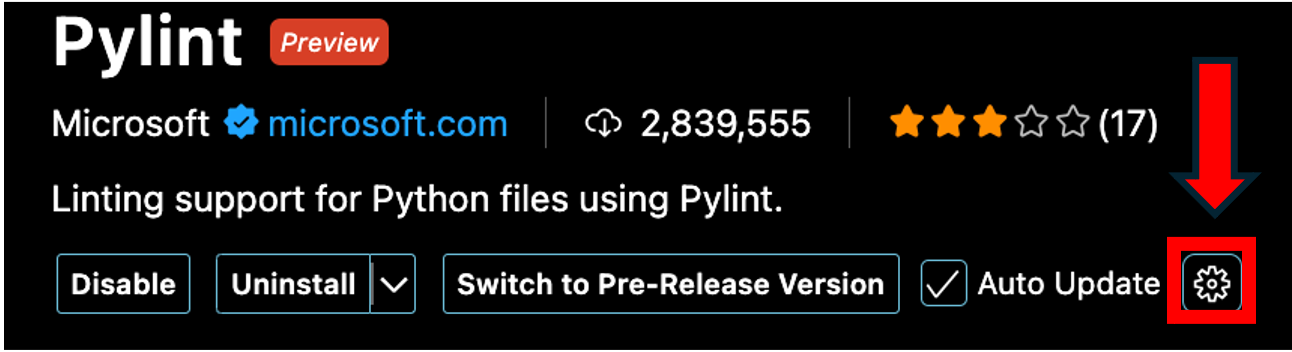
- In the Args section, add these two args one at a time by clicking on "Add Item":
--disable=import-error--disable=assignment-from-no-return
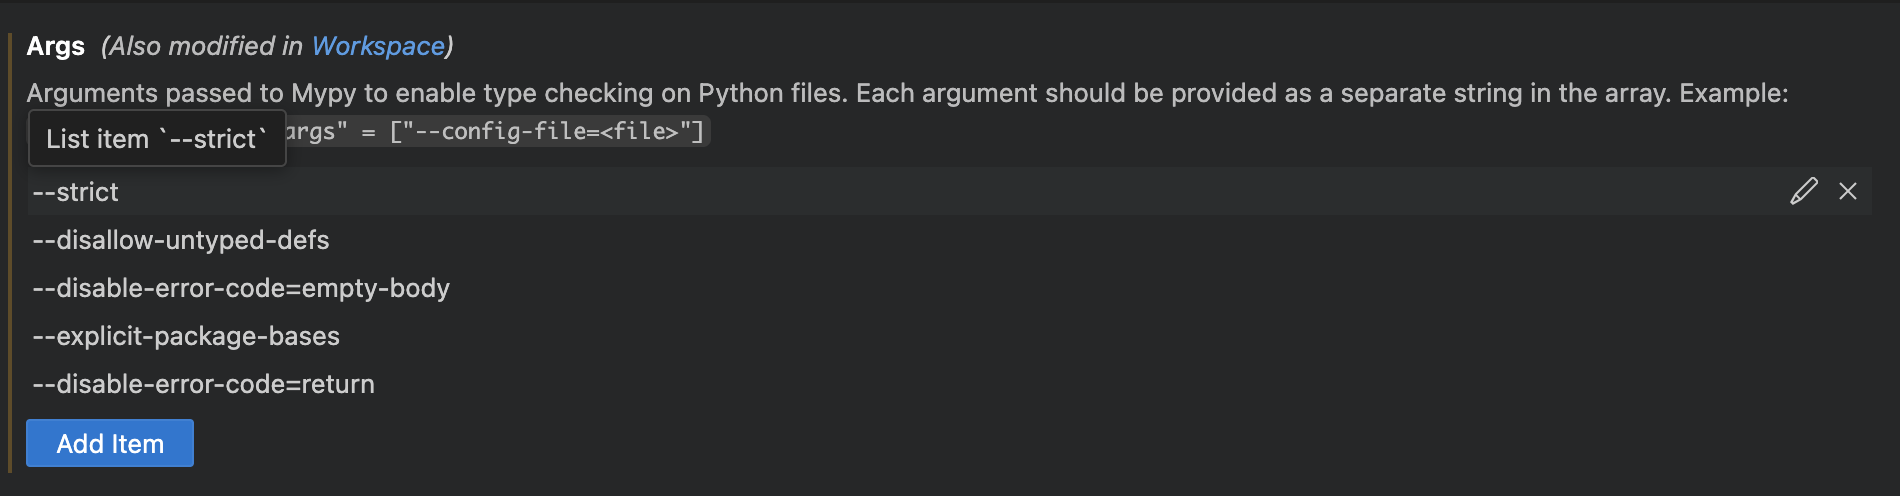
Install MyPy Type Checker Extension
We will use MyPy to report type errors in our programs
- In the Extensions tab, search for “Mypy Type Checker” and click Install
- Open the Settings (as you did in the previous step)
- In the
Argssection, add these five args (one at a time):
--strict--disallow-untyped-defs--disable-error-code=empty-body--disable-error-code=return--explicit-package-bases
Now, any missing or mismatched types will be reported in the "Problems" tab (bottom pane where there is also an Output tab) every time you save or open a file
3 Installing Git
For homeworks and labs, we will use Git version control to keep track of changes, push, and pull from GitHub. Lets set that up
3.1 Git Install
macOS
- In a terminal (either in VS Code, or the Terminal app), run the following command:
git --version
- If the output looks something like
git version 2.50.1(any version number should be fine), then you can skip this step and go to Git Configuration
- If you get an error, the following popup should appear:
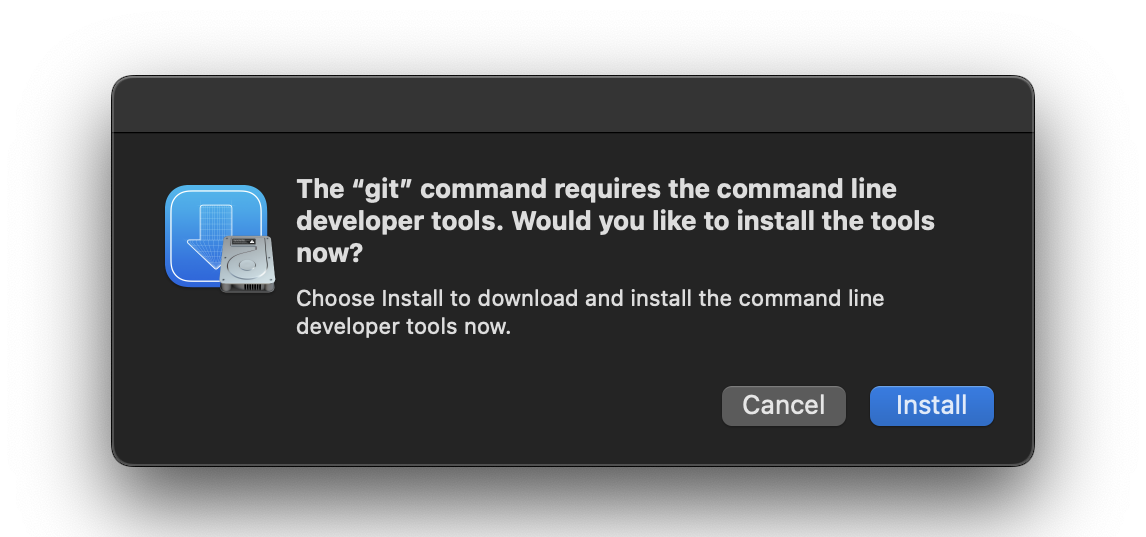
- Click install and wait for it to complete
- Quit VS Code, then reopen it
- Confirm it worked by running the command above again
Windows
- In a terminal (either in VS Code, or the Command Prompt or PowerShell apps), run the following command:
git --version
- If the output looks something like
git version 2.50.1(any version number should be fine), then you can skip this step and go to Git Configuration
- If you get an error, visit git-scm.com/install/, select Windows, and click where it says "Click here to download the latest" at the top
- Follow the installation instructions
- Quit VS Code, then reopen it
- Confirm it worked by running the command above again
3.2 Git Configuration
-
Before you can commit & push, you must configure Git
- Start a VSCode Terminal (Terminal -> New Terminal)
- Type
git config --global user.name "YOUR_NAME"and hit enter (putting your own name instead ofYOUR_NAME) - Type
git config --global user.email "YOUR_EMAIL@northeastern.edu"and hit enter (putting your own email instead ofYOUR_EMAIL)
4 Your First Python Project
Let's use VSCode to create a project folder, and set up virtual environment
4.1 Set Up Project Folder And Python File
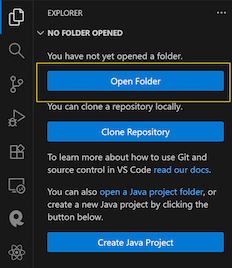
- Open VS Code
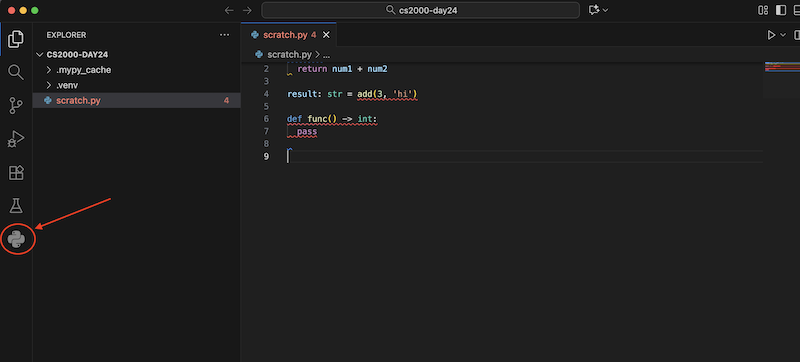
- Click on the Explorer icon on the left sidebar (top-left most icon) in the image below
- Click Open Folder
- In the dialog that appears:
- Choose where you want your folder (e.g., Desktop or Documents). You must not create your folder within your One Drive folder
- Click New Folder
- Name it
cs2000-day24, then click Select Folder (Windows) or Open (Mac)
- Once the folder opens in VS Code, look at the Explorer panel. It should now show your folder name at the top. (You might be asked whether you trust the authors)
- Hover over the folder name, and click on the New File icon
- Type
scratch.pyfor the filename and press Enter. The file will open in the editor
4.2 Check Python Environments Extension
Important Look in the sidebar, perhaps three dots, and check if you see the Python icon:
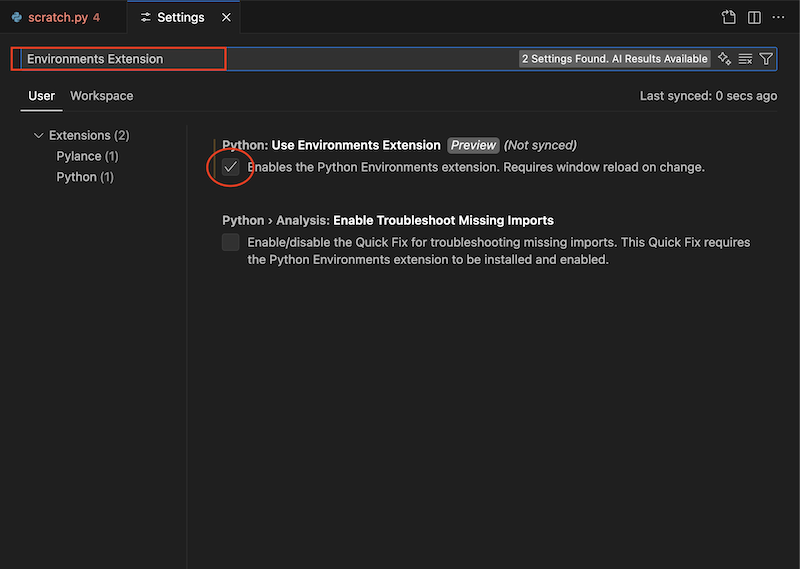
If it is not there, go to VSCode's Settings menu
- Mac:
Code>Settings...>Settings(orCmd+,) - Windows:
File>Preferences>Settings(orCtrl+,):
Type "Environments Extension" in the search bar. Check the "Python: Use Environments Extension" box. Exit and restart VSCode, and the Python symbol should appear
4.3 Now Set Up The Virtual Environment
We will use a per‑project virtual environment named
.venvso tools run consistently
- Press
Cmd/Ctrl + Shift + Pand at the>prompt type Python: Create Environment - If prompted, choose "Quick Create", which should say "Uses Python version 3.XX", where XX is the version you installed
- You may be prompted to choose a virtual environment, be sure to choose
Venv - Be sure to select the appropriate Python version
- You may be prompted to choose a virtual environment, be sure to choose
- Once the operation completes, you’ll see the Python version displayed in the bottom-right corner of the window when a
.pyfile is open, written as.venv (3.XX) - If MyPy is set up properly, then add this code to our
scratch.pyfile:def add(num1: int, num2) -> int:
return num1 + num2
result: str = add(3, 'hi')
def func() -> int:
pass
Once we save, you should see three errors in red (there will also be warnings from Pylint, in blue, about missing doc strings, both for the functions, and at the top of the file):
num2's missing typeadd()'s returning something other than the promisedint,result's value being anintwhen the variable type isstr
5 Install pandas, pandas-stubs, And pytest
Each project we work in should have its own virtual environment, which means it will have its own set of packages; a package consists of existing pieces of software that allow us to work on particular tasks
5.1 Important Instructions for Windows Users
Windows machines sometimes restrict running scripts, which is what Python relies on. If you are on a Windows machine, please check the following before installing Pandas and Pytest:
- Use the keyboard shortcut Windows + X
- Click on Terminal (Admin)
- The system should ask if you want to make changes to your computer. Click Yes
- A window should pop up titled Administrator: Windows PowerShell
WARNING: Do not execute random commands in this window. This is an elevated command prompt and can do serious damage if used improperly. The two commands in these instructions are safe to run - Run
Get-ExecutionPolicy - If the output is Restricted, go to Step 7. If it is anything else, skip to Package Installation Process
- Run
Set-ExecutionPolicy -ExecutionPolicy RemoteSigned. This command will allow scripts downloaded from elsewhere to run if they are signed by the publisher. They will also allow all local scripts to run no matter what. For more information, read this article - Close the Administrator Command Prompt window
5.2 Package Installation Process
We will use Pandas, a popular library for data analysis, for work with tables and spreadsheets, and the Pytest library for writing tests
You can add Pandas & Pytest to your virtual environment by clicking on the Python icon in the side bar (it may be hidden behind the three dots -- if you don't see this, please review 3.2 above, and that you installed the Python Environments extension):
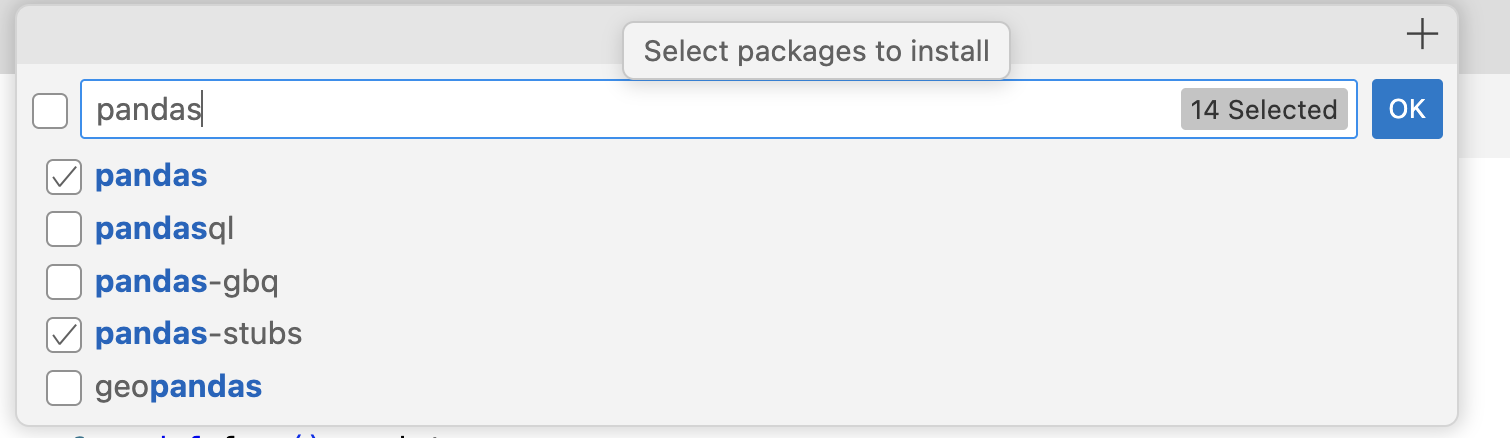
Then, under Environment Managers, find your Venv as .venv (3.XX), and click the little icon that says "Manage Packages" when you hover over it:

Now type "pandas" and check both "pandas", "pandas-stubs":
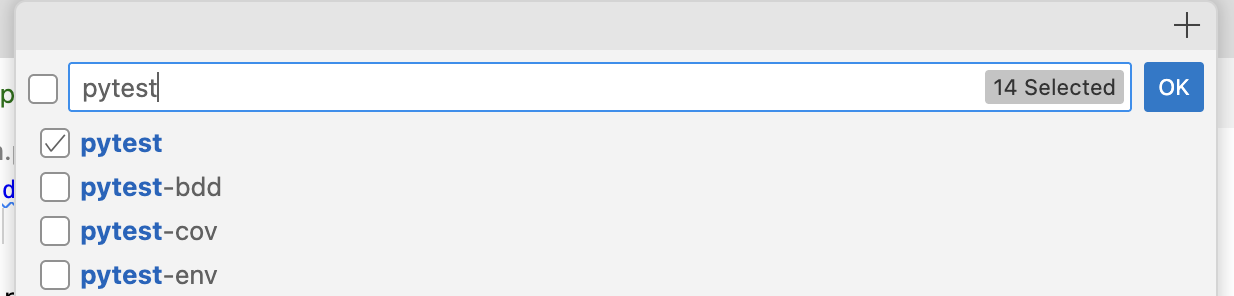
And also search for and check "pytest", and now hit "OK":
6 Log Into GitHub In VSCode
- Click on the accounts icon in the bottom left of VSCode:

- Click "Sign in" (or, if that's not an option, "Sign in to use AI features..." or "Sign in to use Copilot")
- Select "GitHub", and follow prompts in browser that pops up
- You should be redirected back to VSCode, and now if you click on the same icon, it should now say
yourusername (GitHub)at the top
6.1 VSCode: Disable AI Autocomplete
-
Using AI autocomplete is against our course AI Policy, so we need to disable Copilot/any AI autocompletions
Note: If this is your first time installing VSCode, you can likely skip this step. It’s mainly for people who already had VSCode installed and might have GitHub Copilot or another AI completion tool enabled. Do not enable any AI completions for the remainder of this course
- In VSCode, open the Extensions tab on the left sidebar. It looks like this:
- In the search bar, type “Copilot”
- If you see GitHub Copilot or Copilot Chat extensions:
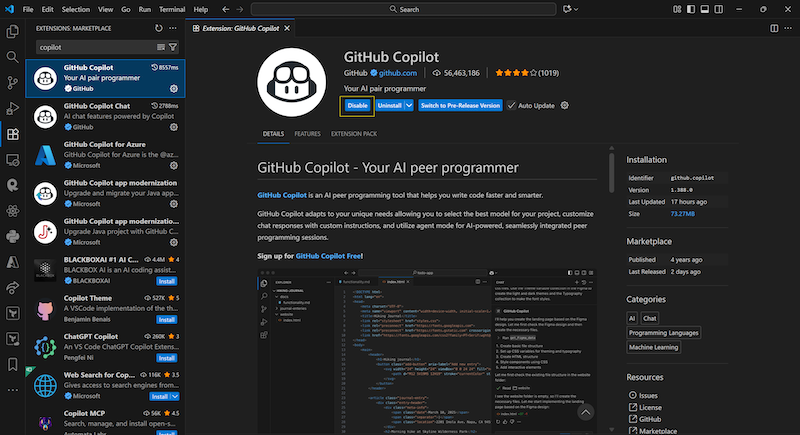
- Click Disable
- Repeat for any other AI completion extensions you may have (e.g., Codeium, Tabnine, CodeWhisperer)
- Restart VSCode
6.2 Access Homework Repository
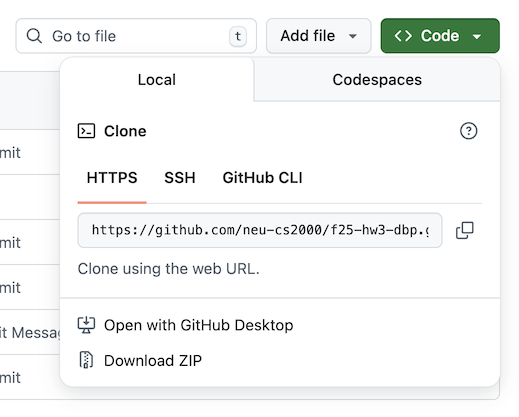
- To get one of your HW repositories, first find it on GitHub.com (follow the link from Pawtograder). Click on the green Code button, click on the HTTPS option, and click the icon to copy the url
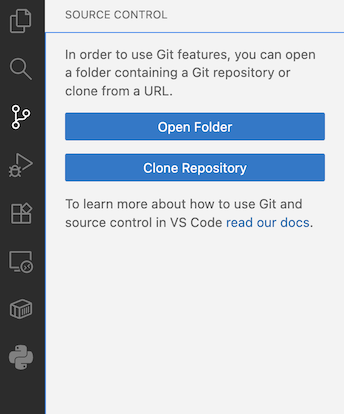
- Now open a new VSCode window (
File>New Window), and then click on the Source Control icon. (If you don't see, type Control-Shift-G.) Click the button that says "Clone Repository". Paste the url you got in the previous step into the text field that pops up. Select "Clone from URL"
- The first time you Clone a Repository, you will be asked to authenticate with GitHub
- VSCode will prompt you to select a folder where it will store this on your computer. Remember where you place it!
- If you get an error about "GitHub SSO" (seems to occur on Windows), please see these instuctions under the FAQs
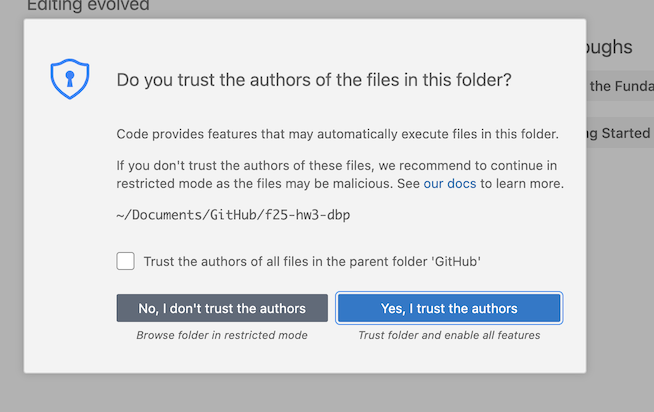
- Once you open the repository, you can say "Yes, Trust the Authors"
- Create a Virtual Environment for the HW NOTE: YOU MUST DO THIS FOR EVERY Python HW/LAB
- Press
Cmd/Ctrl + Shift + P→ type Python: Create Environment - Choose "Quick Create", which should say "Uses Python version 3.XX", where that was the version you installed
- You’ll see the Python version displayed in the bottom-right corner once a
.pyfile is open, written as.venv (3.XX)
- Press
Extras!
Autosave Setup
- At the top of the window, click File
- In the drop-down menu, find the Auto Save option. If it is not checked, click on it
Common Issues And FAQs
I have installed Git, but I keep getting issues trying to push/pull/commit
- Make sure you have correctly configured git with your name, and the email you used to set up your GitHub account, then quit and reopen VS Code
- Make sure you are logged into GitHub in VS Code
- Quit and reopen VS Code
- If all else fails, post in the
#python-installationchannel with a screenshot of what is shown in theOutputsection of VS Code (click theOutputbutton next to theTerminalbutton) and/or attend office hours for help
I installed Python, but I keep getting issues installing the packages or setting up the Virtual Environment
- Quit and reopen VS Code
- Delete the
.venvfile, quit and reopen VS Code, the resetup the Virtual Environment - See
Activate.ps1error FAQ - If all else fails, post in the
#python-installationchannel with a screenshot of what is shown in theOutputsection of VS Code (click theOutputbutton next to theTerminalbutton) and/or attend office hours for help
I am getting an error when trying to download the extensions
- On macOS, make sure VS Code is in your Application folder and not your Downloads folder (you can see this in Finder and can move it to the Application folder). You will have to quit VS Code to move it
- On both: Quit and reopen VS Code
- If all else fails, post in the
#python-installationchannel with a screenshot of what is shown in theOutputsection of VS Code (click theOutputbutton next to theTerminalbutton) and/or attend office hours for help
On Windows, I am getting an error about GitHub SSO
- Download GitHub CLI from cli.github.com and follow the instructions when prompted in the popup
- Type in
gh auth loginin a VSCode Terminal (Terminal Menu -> New Terminal), pick “GitHub.com”, HTTPS, Y, “Login with a web browser”, then press Enter - Authorize GitHub, then quit VSCode and reopen it to ensure changes are saved
- Redo the “Clone repository” instructions and you should have access now
On Windows I am getting an error where Activate.ps1 cannot be loaded/Unauthorized access
- Make sure to follow Important Instructions for Windows Users
- If you already installed Pandas and Pytest:
- Expand the .venv (3.14.0) folder. You should see a list of packages
- Find pytest, pandas, and pandas-stubs. Delete these three packages
- Close and reopen VS Code
- Do the in Important Instructions for Windows Users
- Re-add the packages