Day 2 - Strings & Images
Skills: None
Pre-reading: 3.1.5 to 3.1.7
Supplementary Videos
Github + VSCode Setup, Strings and Images
Intro (20 mins)
Goal Get started with github.dev, vscode; learn about algebra on strings & images.
- Mention discord, other course policies that were skipped, as needed.
- Mention first HW out today (due in a week), ensure they have signed up to https://app.pawtograder.com -- and linked Github.com account! Docs for Pawtograder: https://docs.pawtograder.com/students/intro
- Review: Ask someone for an example arithmetic expression (type exactly what they say: if they don't include parentheses, do not add them yourself, see what error Pyret gives).
- Confirm understanding of spacing, parentheses, expression vs. value.
Create scratch repository on Github for in-class work
-
Go to https://github.com, log in.
-
Now visit https://github.com/neu-pdi/cs2000-scratch and click the "Use this template" button on the right side and select "Create new repository".
-
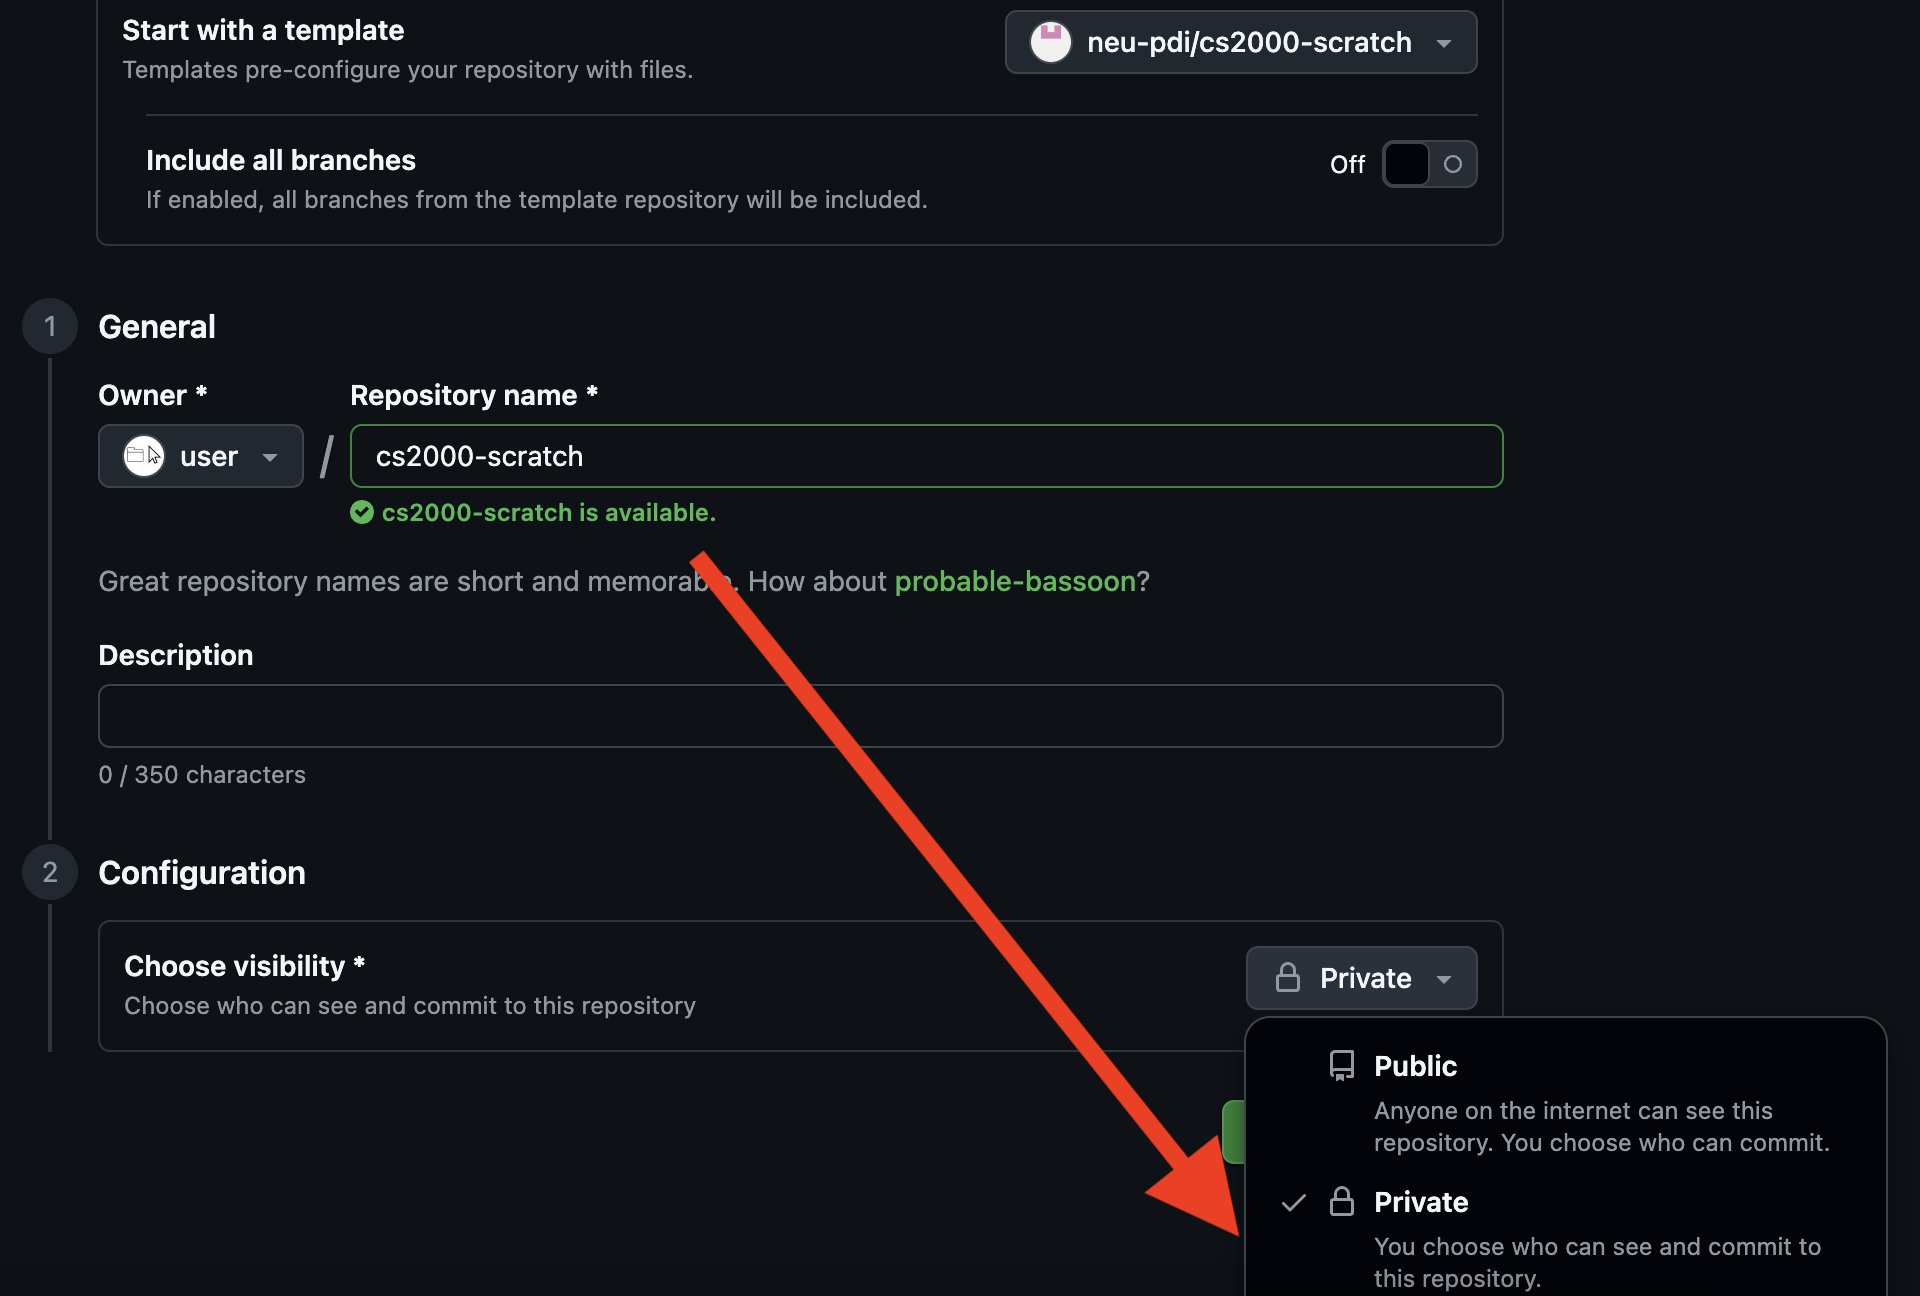
Under "Owner", your username should be selected. For "Repository Name", write
cs2000-scratch. You can all name them the same thing, since the full "name" of your repository will be "github.com/yourusername/cs2000-scratch". -
Make sure to set it to Private.
-
Once it generates, while viewing the repository, type the "." key. This should redirect you to "github.dev/yourusername/cs2000-scratch" (note
.devrather than.com).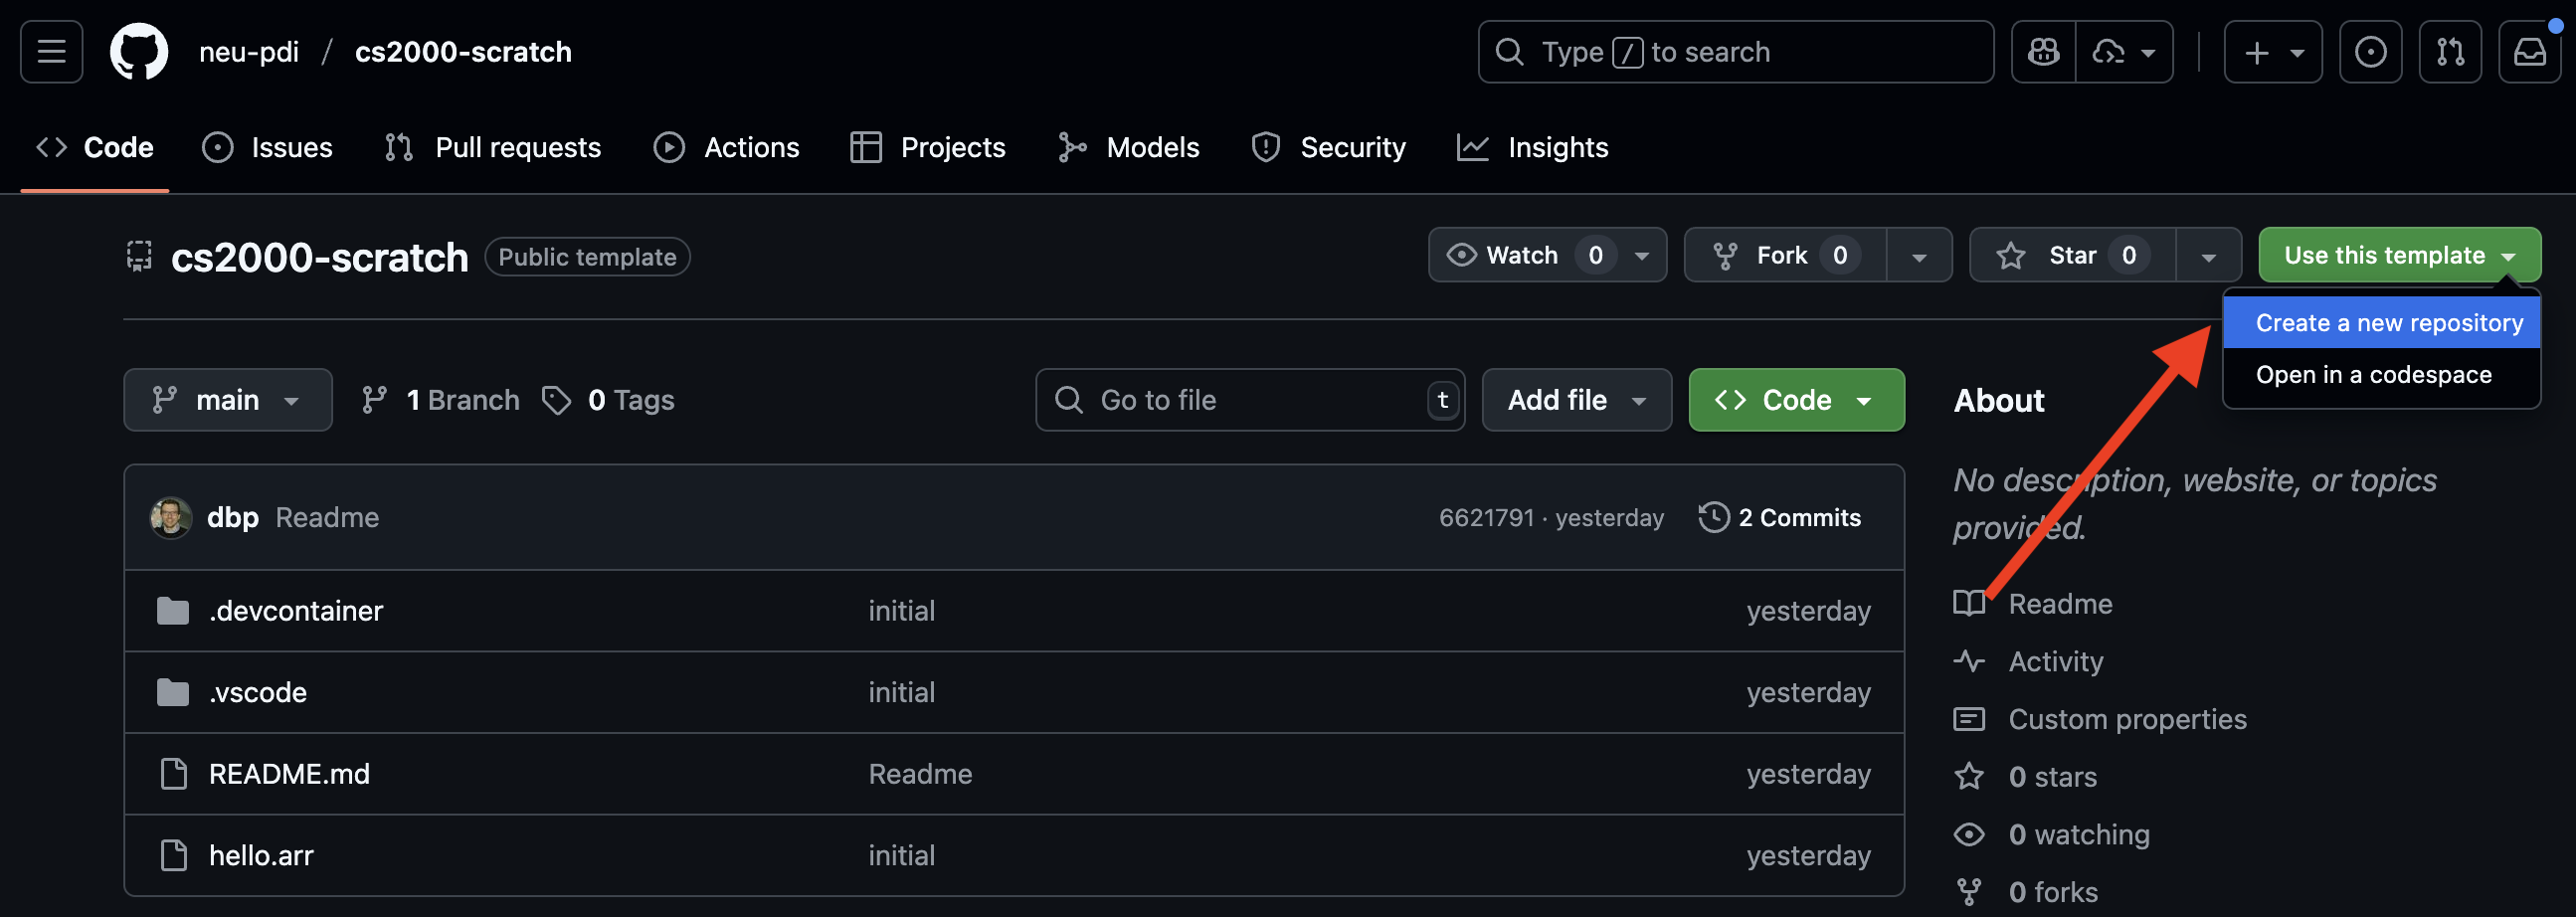
-
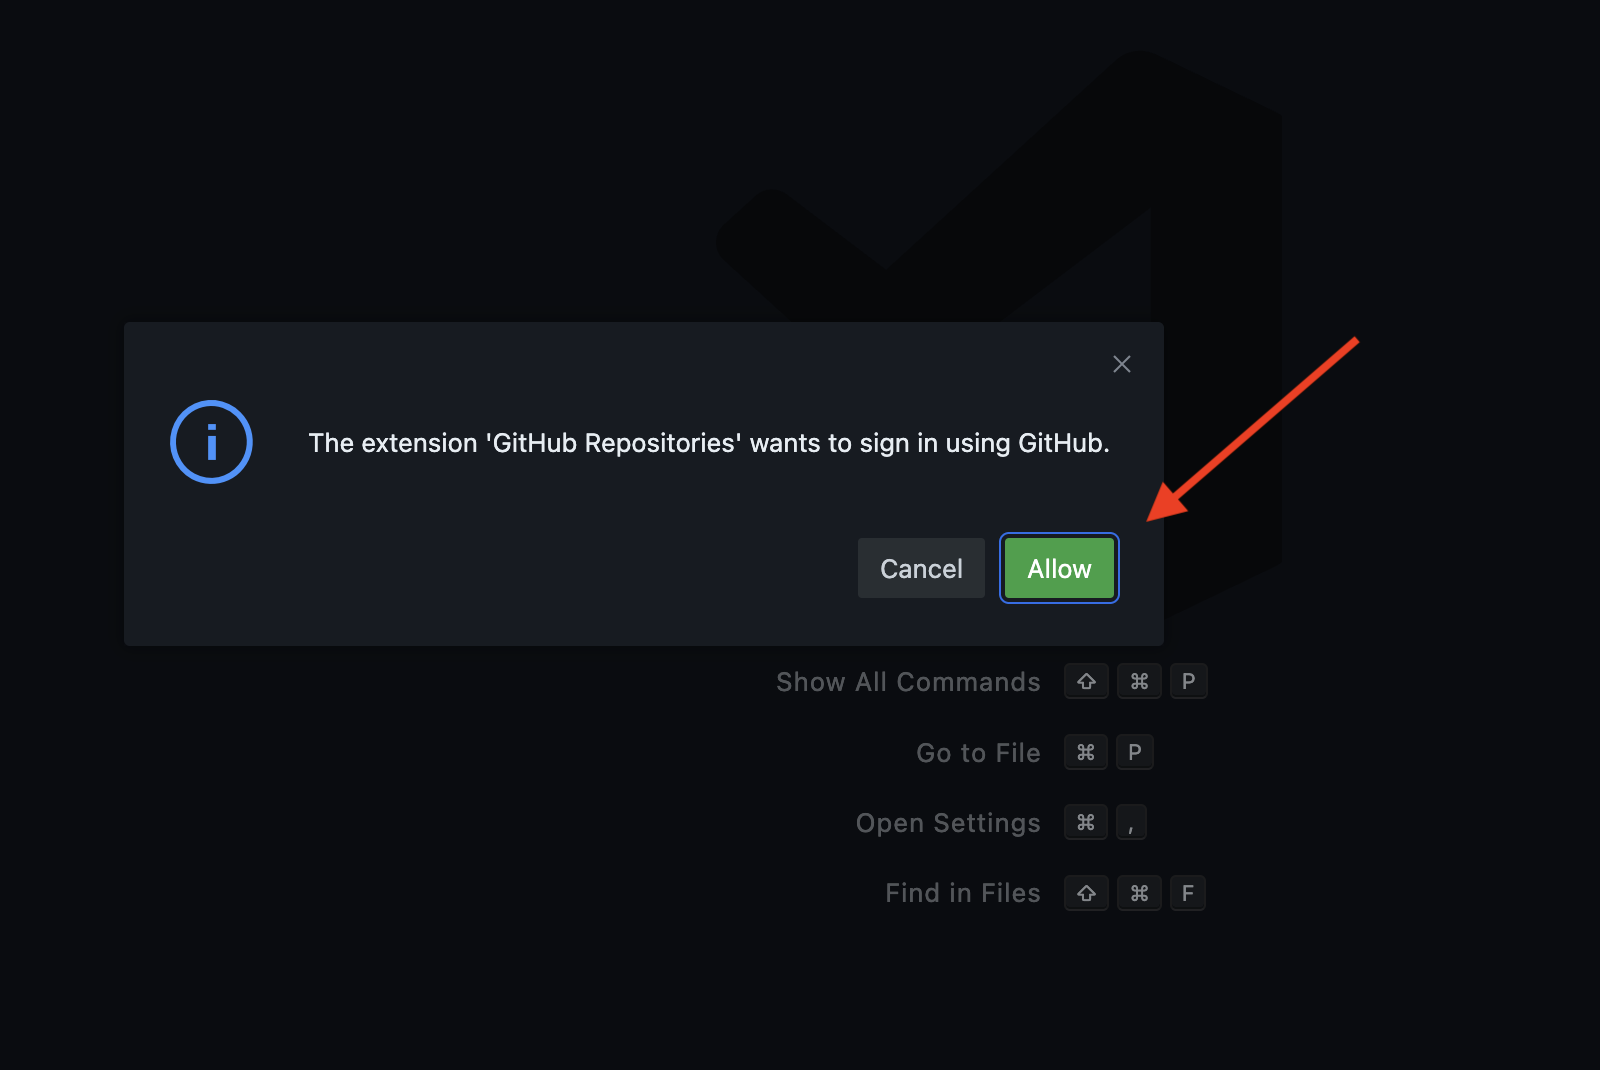
There are a sequence of installation steps you have to go through the first time, but won't again unless you switch to a different computer / browser profile, or if you are in incognito/private browsing mode.
-
It will first prompt you that Github Repositories wants to sign in using Github. Click "Allow".
-
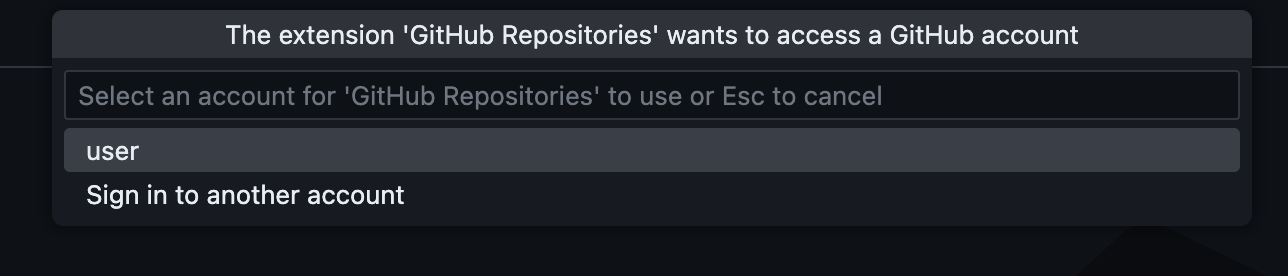
Then it will ask you to select a github account. Your account should be listed; click on it. These two steps will only happen once.
-
A file called
[Preview] README.mdwill open up. It has a link tohello.arr. Click that.
-
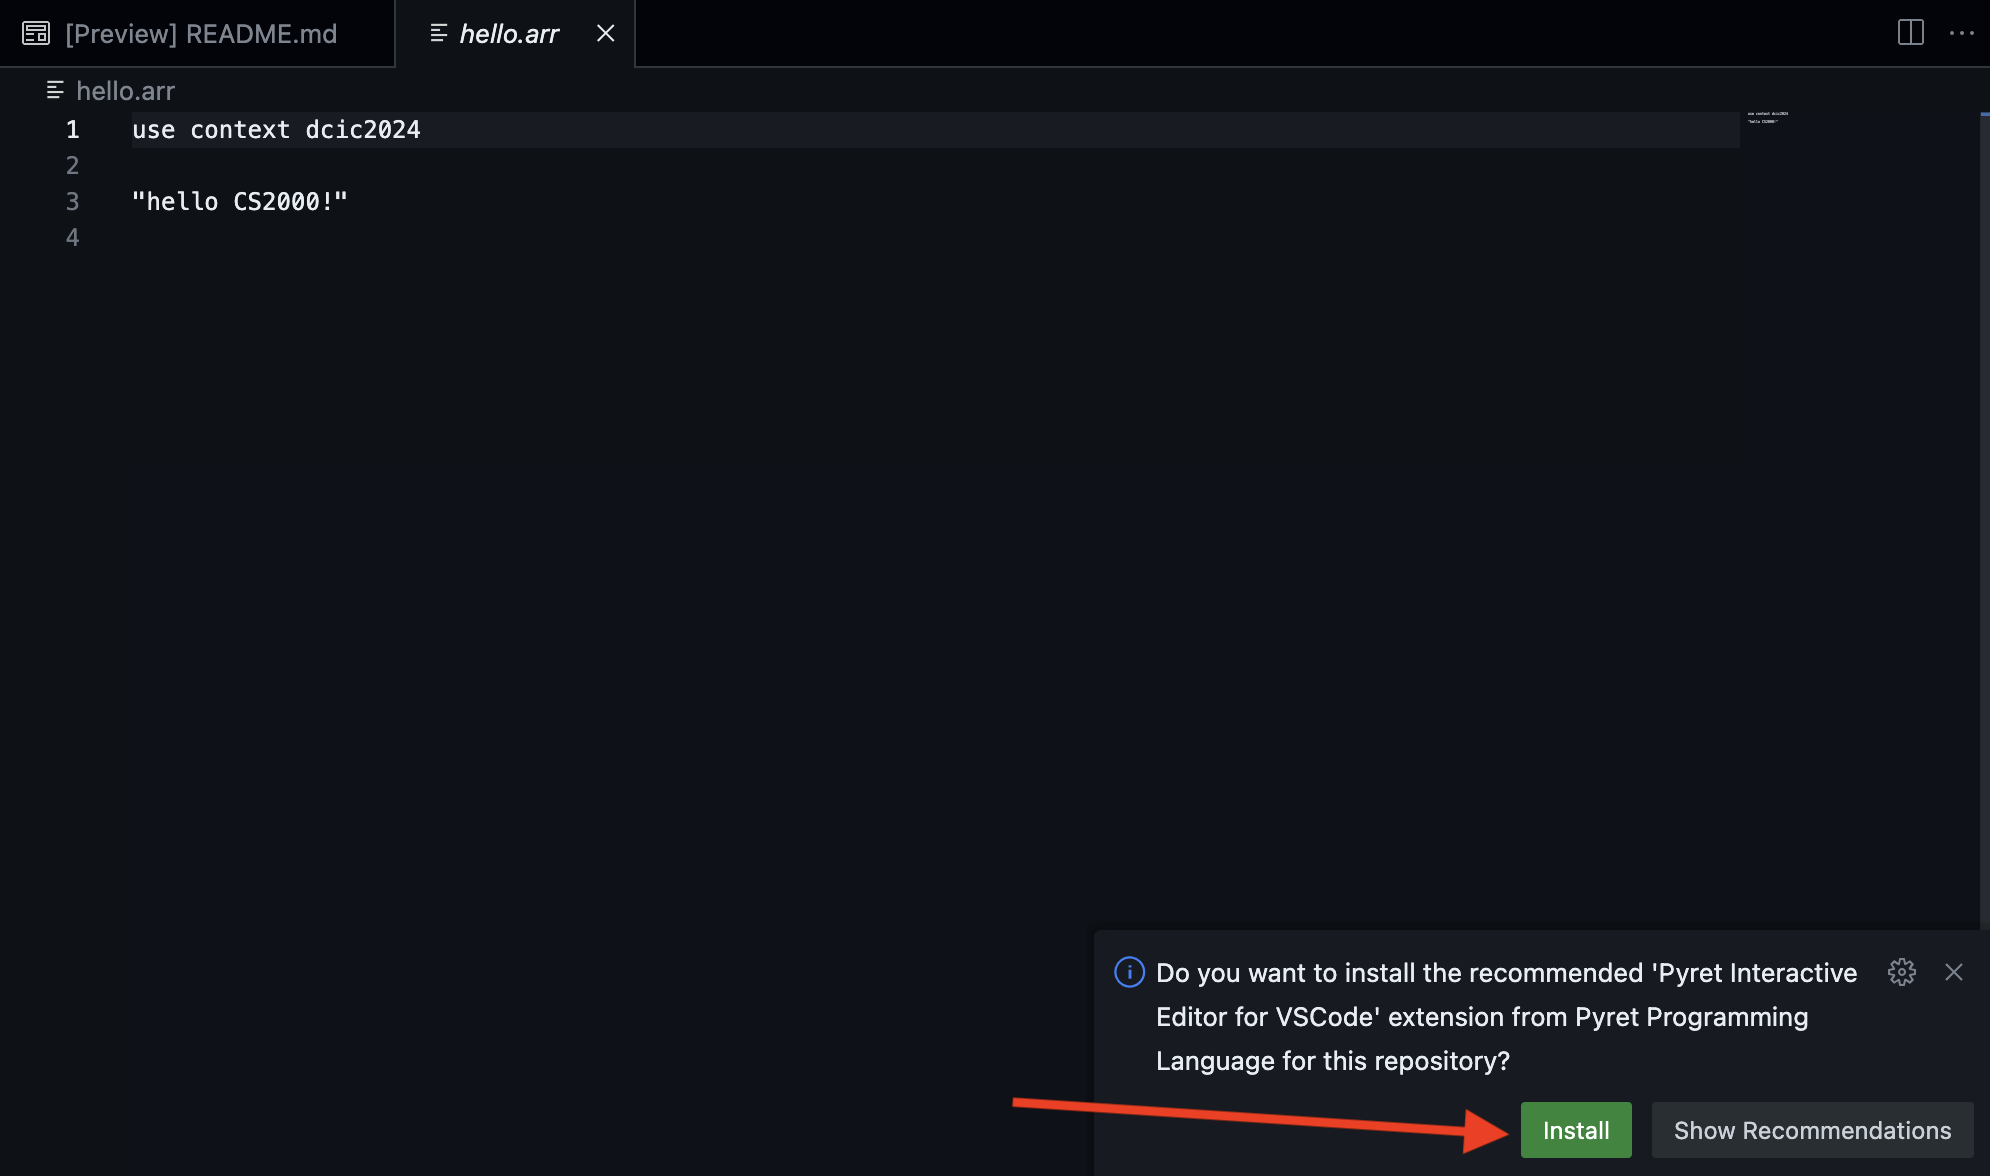
A window near the bottom will pop up, prompting you to install an extension for Pyret.
-
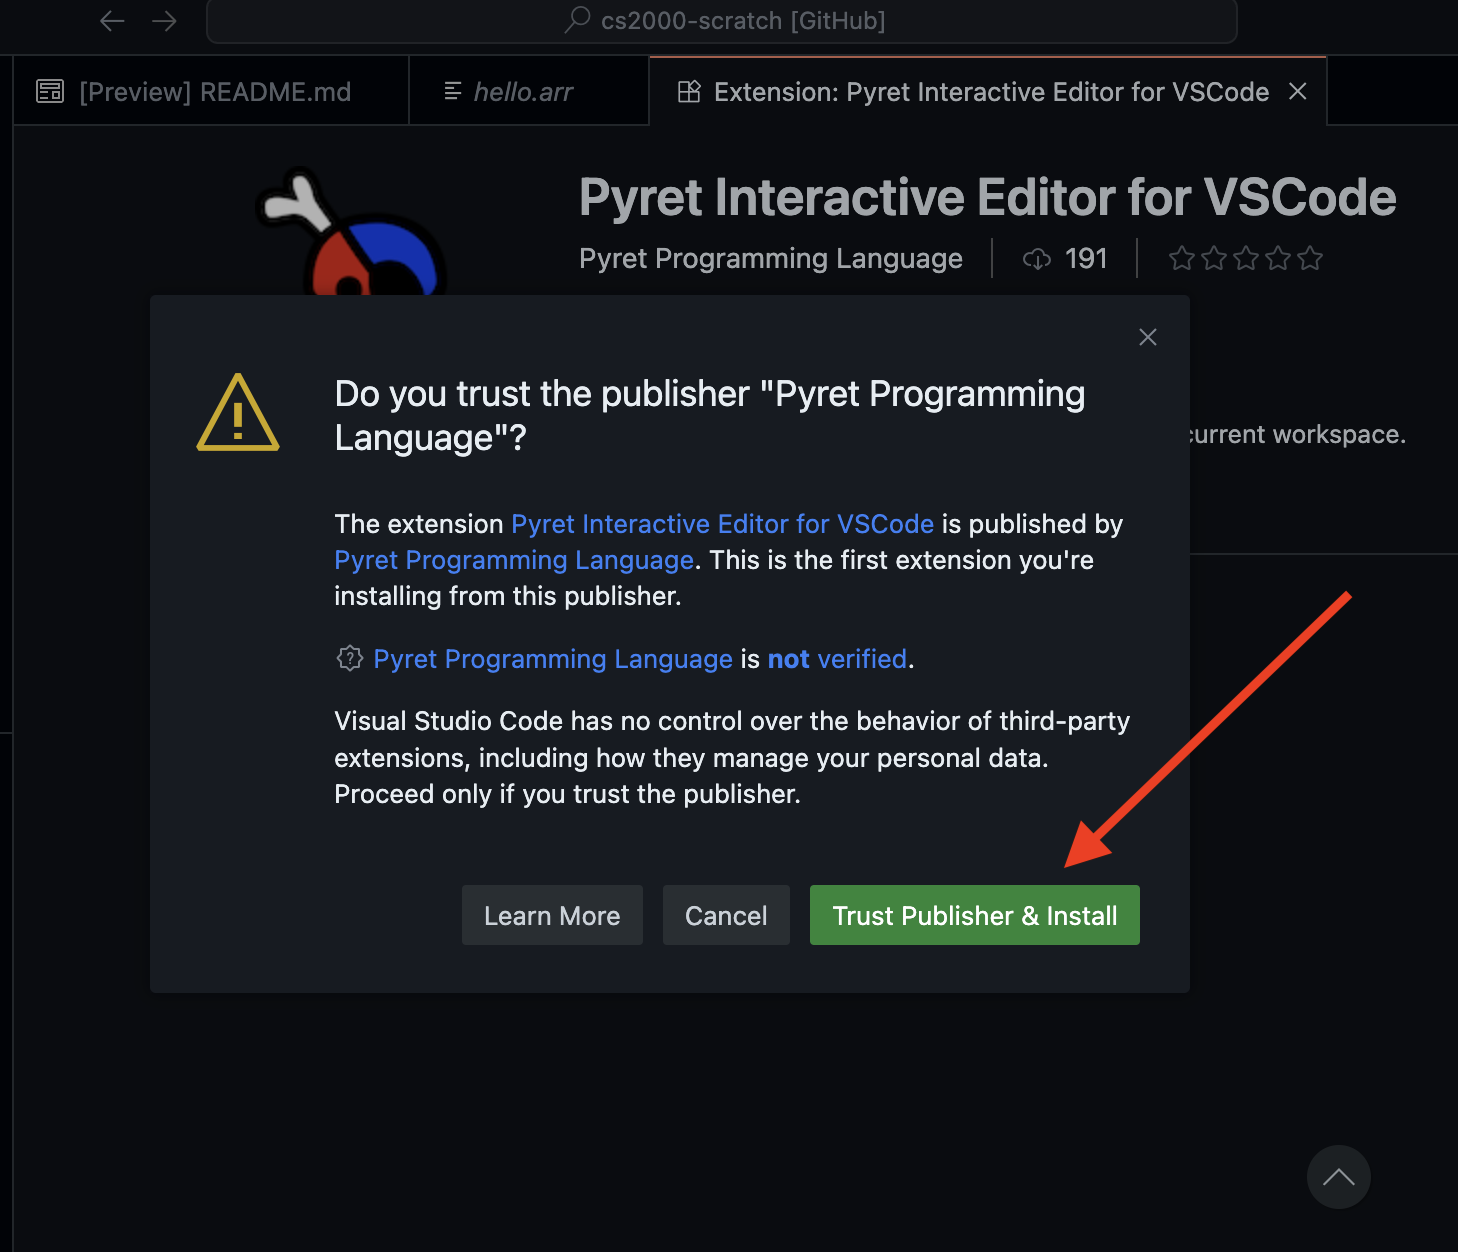
Once you click "Install", a window will pop up, showing you the extension. Click "Trust Publisher and Install".
-
Now close the extension panel, and the
hello.arrpanel, so you get back to just the[Preview] README.mdpage. -
Finally click the top icon on the left and click the little icon to make a new file. Type
2.arras the file name. This will be your file for today, which is the second class.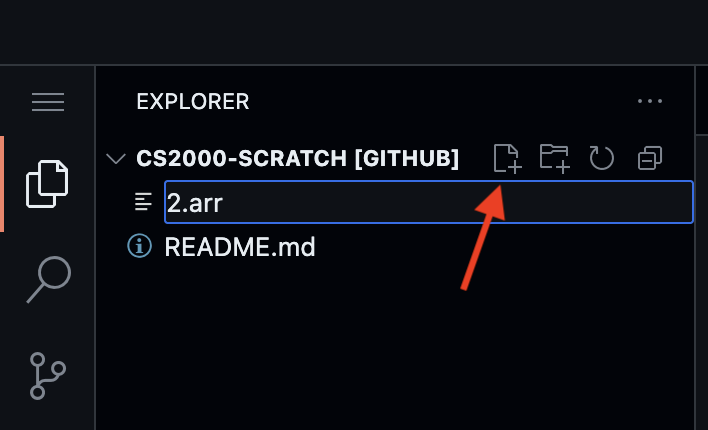
-
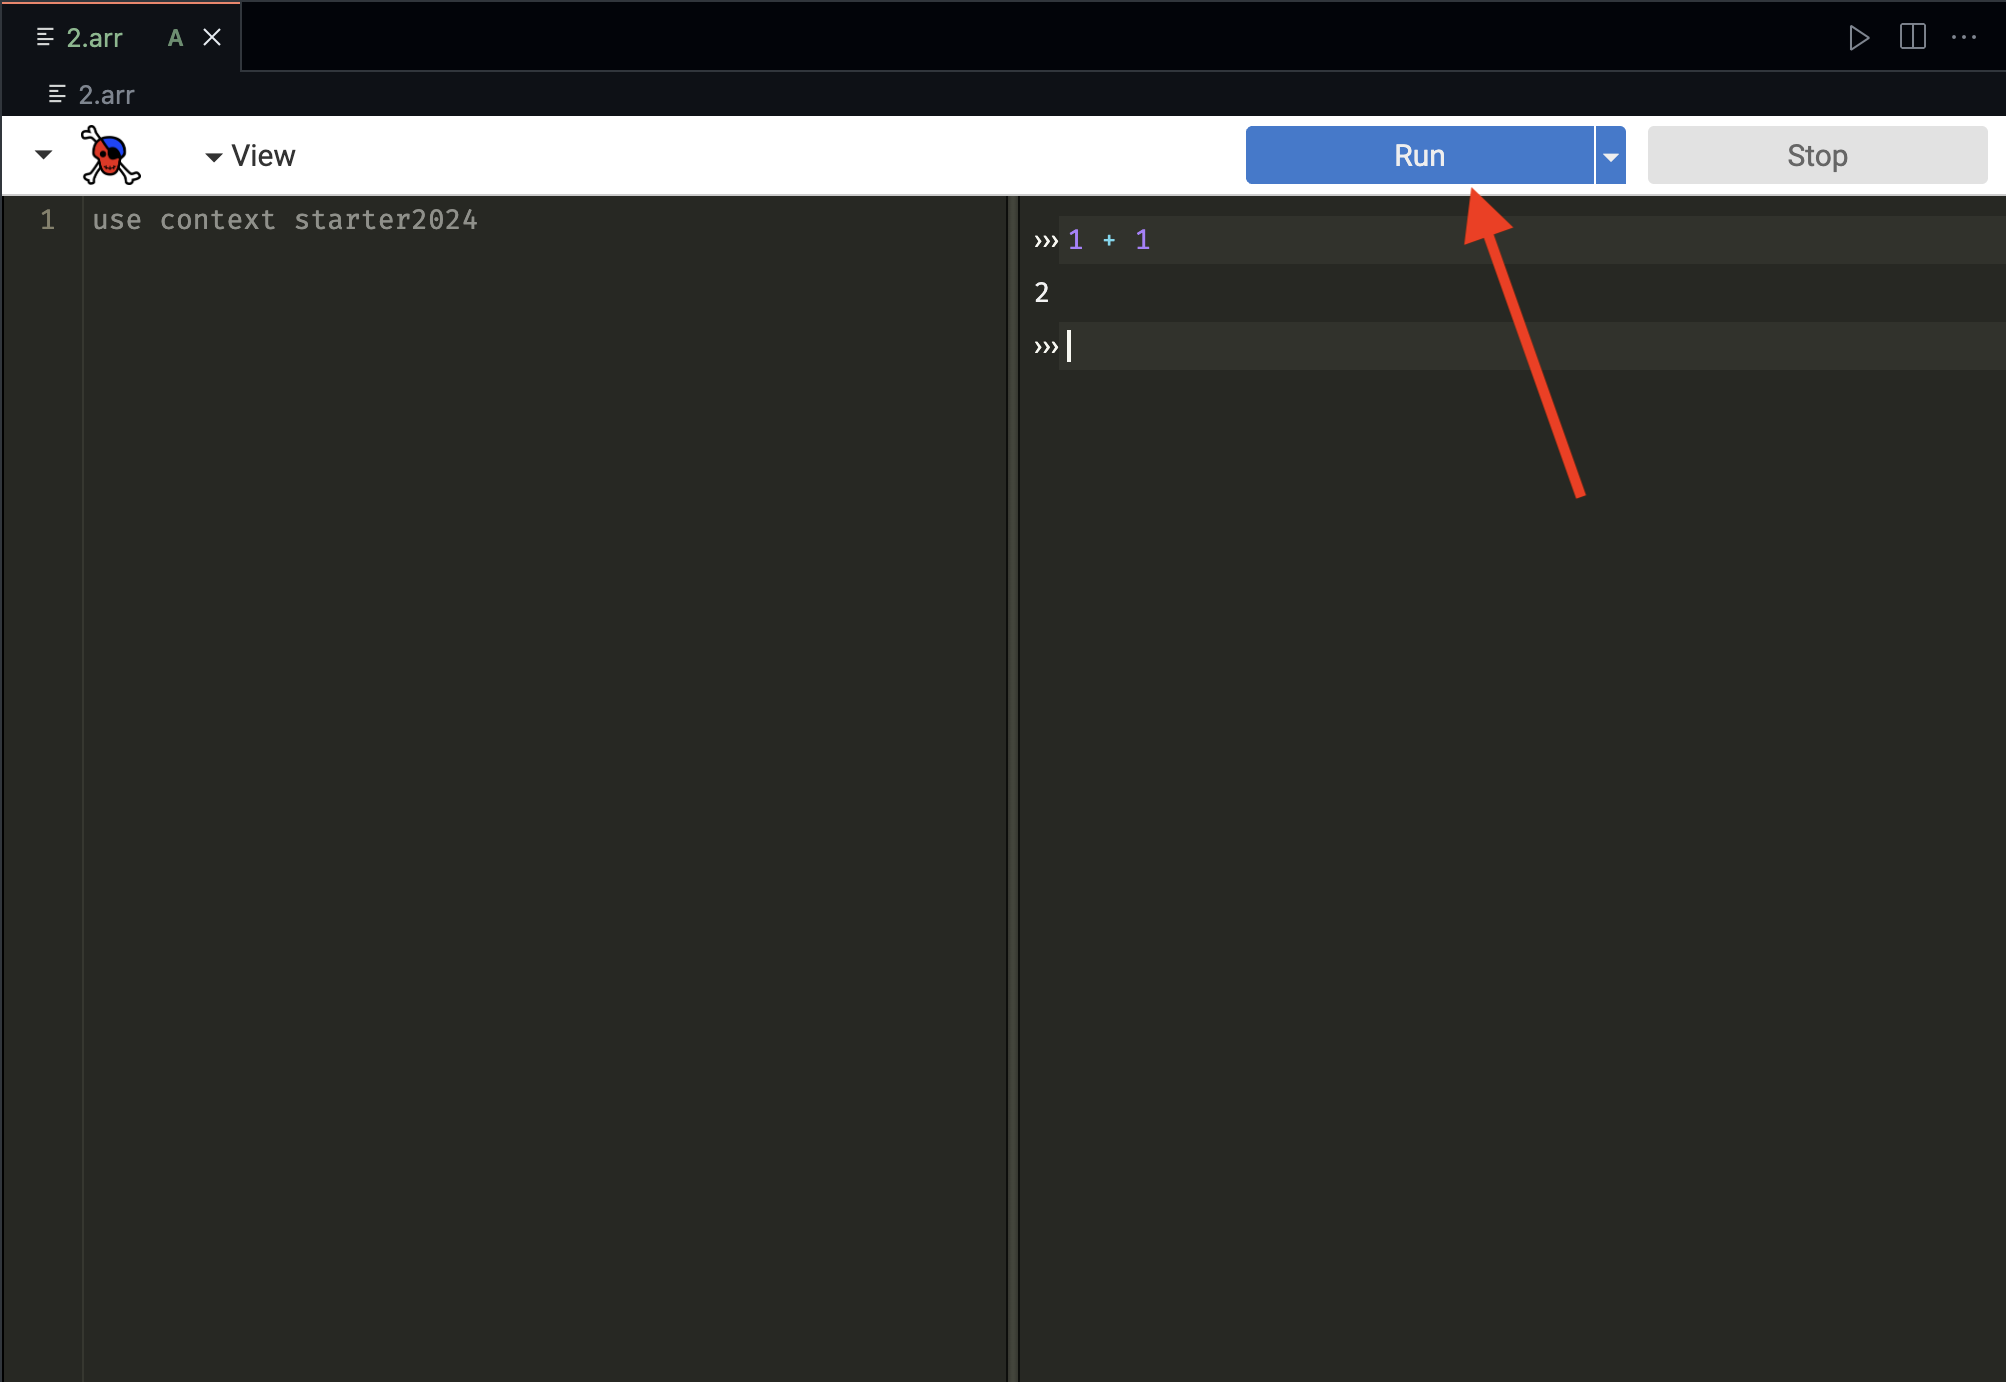
Notice that there is a blue "Run" button at the top; what is visible by default is just the definitions window. When you hit run, you then can see both the definitions and interactions windows.
-
Add an expression to the definitions window, like "1 + 1".
-
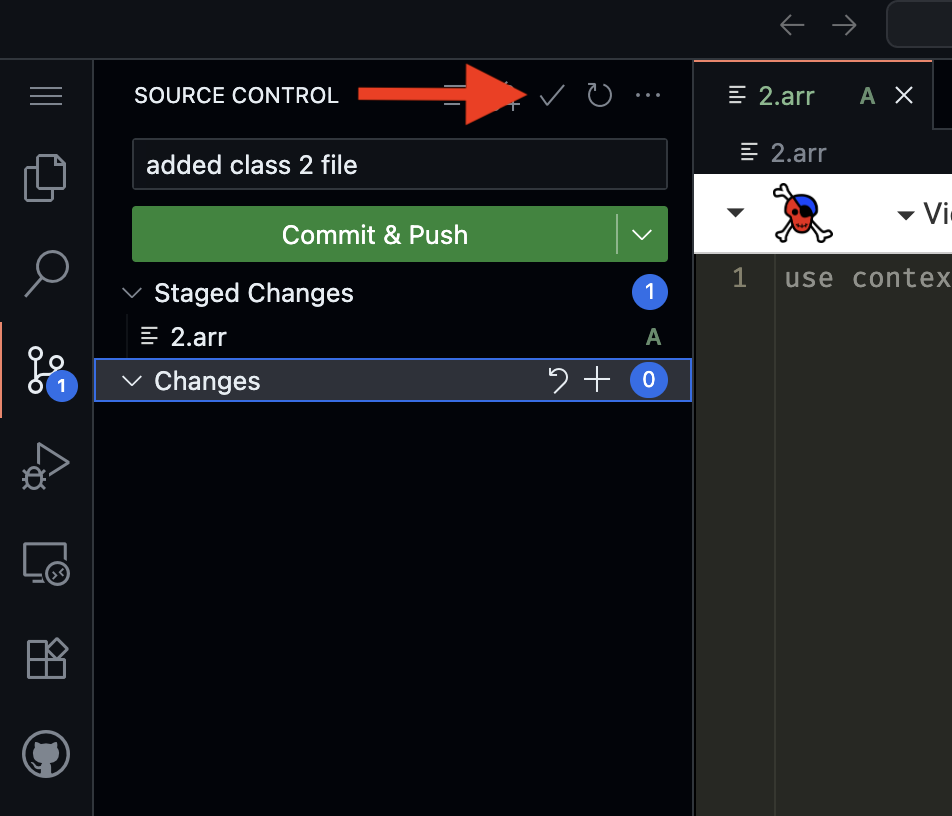
To save your work, Github requires us to "commit" -- essentially, make a checkpoint with a message describing what we did since the last one. The icon on the left that has circles and lines (and now a blue circle with a 1 in it) gets you to the interface to do so. First, type the message, like "added class 2 file". Now click somewhere below the message, and it lists the "changes". You have to add each change you want to be included in the commit, by clicking the + next to the file. This moves the files to the "Staged Changes" section -- these are what will be included in the commit. Once you've added everything, click the checkmark at the top to make the commit.
-
It's good practice to commit often -- at the very least, every time you do some work that you would rather not lose. If you are working on an assignment for several hours, you should commit many times during that period.
Data for text
- Last time we showed how to use numbers in Pyret -- today we are going to introduce two new types of data, and operations on them.
- The first is text -- i.e., words, sentences, paragraphs, etc. These are called "strings", and are written as either
"hello cs2000!"(i.e., double quotes around characters), or if you want the string to be able to cross multiple lines, you can write it as:
```
Hello
There!
```
- Like numbers, there are operators on strings.
+takes two strings and creates a new string with the second one put after the first, which is sort of a string version of "adding", but there are also operations that don't have analogs to numbers, e.g.,string-length(s)returns the number of characters in the string, andstring-repeat(s, n), assumingsis a string andnis a non-negative number, returns a new string that contains the stringsrepeatedntimes.
Data for Images
- Just like numbers and strings, we also have images in Pyret.
- We can create basic shapes with functions like
circle,rectangle,triangle, e.g.,circle(30, "solid", "blue")
rectangle(40, 20, "solid", "green")
triangle(50, "outline", "black") - Like with numbers and strings, there are operations on images -- e.g.,
overlay(i1,i2)creates a new image that has the first image on top of the second (so if the first image is larger, you will not see the second image at all), vs.above(i1,i2)composes the images by creating a new image that includes the two inputs adjacent, one above the other, andbeside(i1,i2)creates a new image that has the two images provided side by side.
Class Exercise (30 mins)
- Look through https://pyret.org/docs/latest/strings.html and find how to turn a string to all uppercase, and apply it to the string "hello cs2000!".
- Create a blue circle and a yellow rectangle, then overlay them so the circle appears on top.
- Stack a green rectangle above a purple rectangle using
above. - Look through https://pyret.org/docs/latest/image.html, and find how to rotate an image; use that to produce a red rectangle that is 100 wide by 20 tall in two different ways.
- Create a Stop sign (look up an image for reference).
text,regular-polygon, and other functions you've already seen may be helpful. - Create another image of your choice!
Wrap-up (10 mins)
- Did anyone get errors while they were working on these exercises? (Get someone to share -- likely is a type error, either arity mismatch or passing wrong input type to one of the functions).
- In Pyret, all values have types -- what we've seen so far are: Number, String, Image.
- Further, operations have types that they take in, and types that they produce. These are usually written down in the documentation as contracts, with
::, e.g.:* :: (Number, Number) -> Number
circle :: (Number, String, String) -> Image - This captures both the number of arguments (two for
*, three forcircle) and the type of the arguments, so if you make a mistake in either, Pyret can report that. - When we get to writing our own operations, we will write down types for them, so that similarly, Pyret can report if our operations are not used correctly!
- Next time: named definitions and the difference between expressions and definitions.